Showing posts with label thin. Show all posts

Monday, January 9, 2012

Antichron

A year ago I probably wouldn't have attempted to build something as twisty and complex as Bathsheba's Antichron model.  But someone sent me a reduced-size model of it, and I confidently devised a small set of peeling cuts that should have made it an easy build on the SD300.  Not so easy, as it turned out.

I got it mostly right.  I'd divided the model into four zones in each of the upper and lower sections, so the support material peeled away effortlessly at first.

But when I got near the middle section I found layers of support material permanently wrapped around sculptural features I'd misinterpreted.  If it had been properly planned, there should have been additional cuts to divide the support material but I hadn't instructed the SDMove software to make the proper cuts.

Was it necessary to discard the model just because I hadn't set up the build software properly?  Probably not, but I decided to free the model so from the rest of the material to get a better view of the trouble spots.

The support material was thicker than the walls of the model so I couldn't just remove them by brute force.  So I decided to separate the support layers and snip them one-at-a-time with a small knife.  This was tedious but it would free the model after cutting through dozens of layers on each side.  That would take a while so I put on an old Edward G. Robinson movie (Scarlet Street) while I worked...and it took most of the movie to free the two models I'd built.

Because I'd scaled down the model by 50% the walls were dangerously thin, about 1.4mm.  Somehow I managed to free the first model without any damage, but cracks appeared in the second model while I was cleaning it so I stopped several times and applied Weld-On to strengthen its weak spots.  When I finished cleaning the second model (below right) I dipped it in Weld-On 2004 to heal the cracks and give it a nice sheen.

Sunday, March 13, 2011

Twirlicue prototype

On Thursday I learned Shapeways has permanently added solid silver to their material choices. Plenty of service bureaus offer precious metals, but Shapeways makes it so hassle-free that I wanted to devise something new just to exploit their new capability.


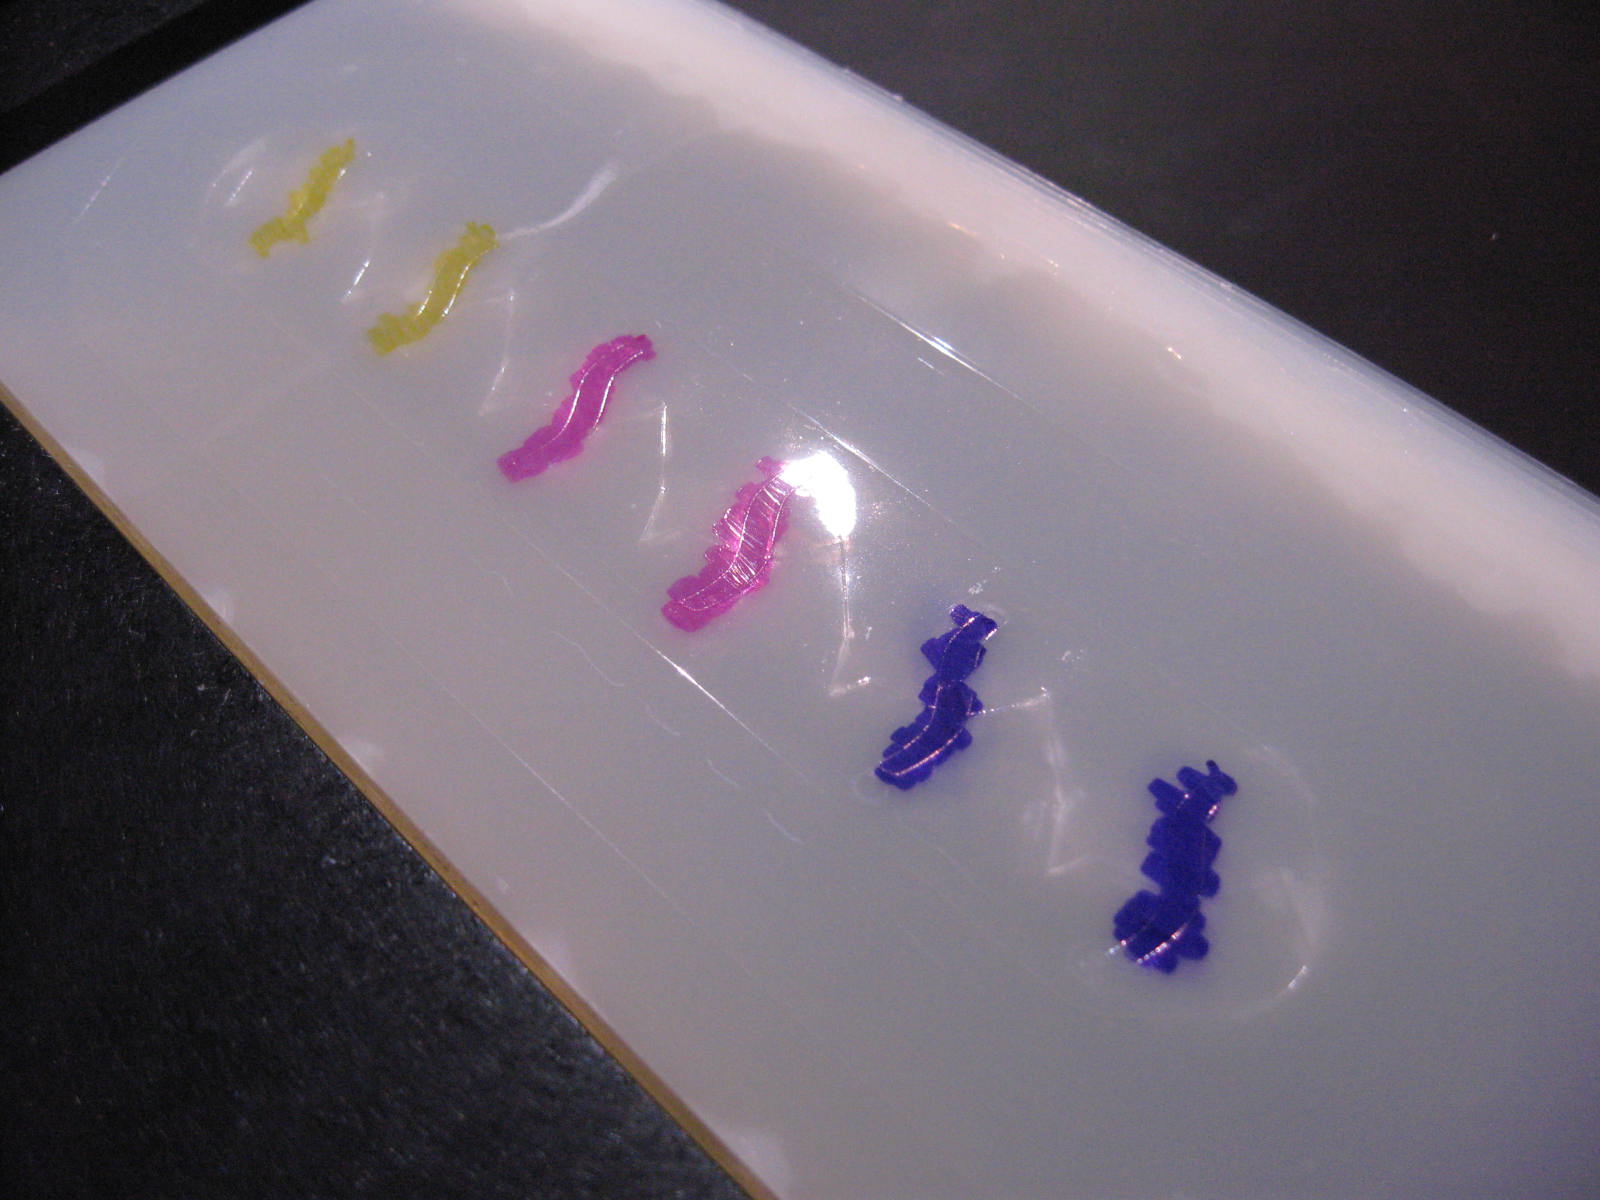
I designed a twirly shape that resembles a twisted potato chip, which is intended to be both a puzzle and a pendant. I built test models on the SD300 before sending it off to Shapeways. Just experimenting, I tinted the models by applying permanent markers to the exposed surface partway through the build process.


Here are the colored markers beside the finished parts. A visual illusion makes it seem as though the colors 'bleed' through the layers, but that's just an optical behavior of the transparent material.


I designed the models to be exceedingly thin because silver is such an expensive material, so these test models are also very thin. Consequently a piece broke away from one of the models when I was cleaning it.


The 'puzzle' is to assemble two pieces as shown here, which will allow them to be strung onto a necklace chain. The chain is a 1mm Sterling Silver box-link chain.


Here's another view showing how tiny and thin the test parts are compared to a US one-cent coin. I don't ordinarily build such thin parts on the SD300 because they require a huge investment of extra attention to remove the supports. It took at least an extra hour to clean these six parts, and I broke one.

Sunday, January 30, 2011

SlideTab in 3D

In January, Chris K. Palmer shared on Thingiverse specially-developed tabs to enable paper templates to be folded and joined together into 3D objects. It's also described at Shadowfolds.com. (I've previously featured a selection of his Sphericon models.)

Could the concept be translated into 3D models representing the same flat surfaces with slots, tabs, and hinges? At the very least, could it be made compatible with SLS?


I started my efforts by adapting the flat squares that can be assembled into a cube. It eventually worked, but only after I'd reduced the maximum wall thickness to 0.6mm. The hinged tabs required thin spots less than 0.2mm thick, too thin for reliable production by SLS.


Next I adapted the triangle models, which could be assembled into a tetrahedron (pyramid), an octahedron, or an icosahedron. But these required excessively-thin walls, like the cube, so the STLs aren't very share-able.


His "hat" models required even greater flexibility, and hence even thinner walls. It takes a lot of flexing to interlock the tabs.


Here's a partly-assembled Rabbi's Hat model.


It's not very dignified, is it?


So I didn't really meet my goal. The STL files are buildable in LOM because it can exploit the inherent strength of the unbroken source material, but the models aren't portable to other 3D printing processes. An SLS machine could build the individual parts (with careful handling) but I doubt they could be assembled.

Thursday, January 6, 2011

Building a custom packing insert


I wanted to ship the parts from my previous Torus project, and they fit very neatly into a small flat-rate shipping box. But I was worried adjacent pieces might slip under each other if the box was bumped, since they're slightly wedge shaped. That could cause them to puncture the container.


So I designed a thin, hinged packing spacer and built it on the SD300. It's less than a millimeter thick, so it barely used any material.


The spacer emerged from the printer in a flat shape, but easily unfolded to form two channels would would keep the parts from overlapping during shipping.


The spacer divided the parts perfectly without occupying any space in the box. I'll probably build custom packing material like this for future shipments, since the material is thin, flexible, and strong in this format.

Wednesday, September 29, 2010

Too thin?

Yesterday I encountered a puzzle designer who'd shared a rough draft of a model with impractical, thin walls. The pictured model is only 19mm high, with many 0.63mm walls and several tapers that were even thinner.

I'd tried to avoid thin walls in my earliest designs for the SD300, but occasionally built thinner walls by chance or miscalculation. Some worked, some didn't, but I always learned something new. So I got permission to build the model, fully aware I was going to have problem with it.


Unsurprisingly, lots of really thin areas broke away while removing the supports. I managed to preserve some walls as thin as 0.5mm by peeling the support material away slowly, one layer at a time. Some undercuts were so narrow I couldn't even reach into them with my curved forceps.


Still, the model emerged sufficiently intact for examination. The channel walls were so thin I could barely get a fingernail inside, and they were noticeably flexible. I dipped the parts in Weld-On 2007, which immensely strengthened the surviving structures.


Surprisingly, the parts can be assembled...barely! The tolerances were inadequate, but they just barely functioned because the channel wall flexes just enough to compensate.


The design doesn't make provision for installing all four parts, so I couldn't assemble the whole puzzle. But it's impressive that it worked at all.


These parts aren't practical due to the overly-tight tolerances, but the model confirms the designer's concept nevertheless. But I certainly wouldn't try to build such thin walls routinely. A comparable model might take 10 minutes to clean away the supports, while this took almost 2 hours. If it hadn't been for the Weld-On dip the parts probably would've broken during testing.

But it shows that the user can venture outside of "good practices" at his discretion. The SD300 will attempt to build any geometry it can process, even if it's not practical. It's the user's choice.