Showing posts with label marble. Show all posts
Monday, August 4, 2014
Building Puzzles for IPP34
I'm busily cranking out puzzles to exchange, trade, and sell at IPP34. In addition to a few old-standy puzzles here's a look at what's new from me this year...
Monday, July 29, 2013
Rundown of puzzles for IPP33
Peppermint, my entry for the puzzle exchange, was digitally manufactured in colorful ABS by Bradley Rigdon at PrintTo3D. I built prototypes on my SD300, those PVC models were a bit too flexible to give the right "feel" for this particular puzzle. Each piece is made in two colors, red and white; the colors play a subtle but important role.
Cubic Trisection is one of the puzzles I also sold at IPP32 last year. The challenge is to assemble the three pieces into a cube, as shown. All three pieces are identical, but not symmetrical. Most users easily assemble the first two pieces, but encounter trouble adding the third.
Puckup is a two-piece assembly puzzle, which I'm selling in transparent material or a red-white color scheme. Tyler Barrett suggested a somewhat edgier name "What the Puck" but the simpler Puckup name had already been picked up on one of the puzzle forums.
Twisty Trillion is a successor to Puckup whose shape provokes a lot more confusion among users. Neither puzzle is fiendishly difficult, but Twisty Trillion takes most people a whole lot longer to figure out. I built them all on the SD300 using transparent vinyl because light reflects attractively inside the puzzle.
I commissioned two copies of a Trillion Pendant to be built as puzzle jewelry--one in brass from i.Materialise, the other in silver from Shapeways. But neither model was delivered on time--Shapeways lost one of the pieces, and i.Materialise is over 3 weeks behind schedule. So I salvaged the partly-incomplete silver model by building its other half in luxuriously-dark blue vinyl, which contrasts gracefully with the silver piece. Frankly, it looks nicer than it would have if both pieces had been silver!
Here's a colorful assortment of marble puzzles, three of which will be available for sale as Bag of Marbles. The others are experimental designs, which I'd like to test on a few puzzlers at IPP. In particular, the pink and purple models are two closely-related designs, but my first few testers think the purple one is much harder than the pink one. Will others react the same way? IPP is a great opportunity to find out!
Tuesday, February 28, 2012
A Week of Successful Failures
This week I experimented with a new 'Marble' puzzle, using direct-modeling CAD programs CoCreate and ViaCAD to create the helical geometry. Previously I'd built these puzzles using Alibre, but it had continually exhibited problems with the helical geometry near the origin. That should be no surprise, I guess, because Alibre's method of defining geometry would yield undefined results for structures that intersect the axis of a helix. Direct-modeling CAD probably won't have that problem because I can define the basic geometry first and then apply a coherent twist as a second operation.
But my first attempt didn't work quite right. Although the STL mesh was superior quality to the ones Alibre had generated, the ends of the helix had a slightly different pitch than the middle. The pieces would fit together, but it require excessive force to get past the section where the pitches were mismatched. I'd just applied the "twist" transformation incorrectly.
I modeled the puzzle again, taking care to allow sufficient gaps between pieces and applying a consistent twist to the whole puzzle. Now the curves were accurate so the pieces fit together smoothly, but the gaps were too large so the pieces wouldn't hold together snugly.
This was an experiment with two new CAD programs, so I decided to build a simpler two-piece dissection as a learning exercise. I tried to compensate for the problems I'd encountered in the two previous samples. This puzzle emerged with an inconsistent twist, just like the red one, so the curves didn't quite match. Evidently I'd compensated in the wrong way.
Like the red one, the puzzle had to be forced past the mismatched curves. But then the pieces were unpleasantly loose because the gaps were too large. Again I had compensated incorrectly, so instead of avoiding the faults of the previous two samples this puzzle exhibited all the faults of both. Even so, that's a good sign because it confirms that these issues can be properly managed...I just got careless somewhere.
In the meantime I had tried to build a new revision of my flat maze puzzle, but I ran into trouble while cleaning the model. The outer layers had cleaned up nicely, just like the last two test models, but I was completely unable to clean the leftover material out of the middle layers. It clung stubbornly in the grooves.
In my last revision of this model I'd brought the two surfaces closer together so their respective grooves overlapped. That created continuous loops and circuits in the middle of the model, but these middle paths weren't completely accessible from either side...so the material couldn't be pulled out from either side.
In SDView I added an elaborate web of small peeling cuts inside the middle layers of the maze to isolate the material into pieces that could be pulled out from one side or the other.
But the layers didn't laminate together properly when I tried to build the model, so I canceled it halfway through because the plastic was starting to come apart. The last three versions of this model had built okay (other than entrapped material in the last) so I'm not sure whether this was just bad luck or an indication of some other fault. Maybe there are just too many cuts in the model, or maybe the cutting knife needs to be replaced.
Despite all these experimental failures, I think it was a very productive week!
But my first attempt didn't work quite right. Although the STL mesh was superior quality to the ones Alibre had generated, the ends of the helix had a slightly different pitch than the middle. The pieces would fit together, but it require excessive force to get past the section where the pitches were mismatched. I'd just applied the "twist" transformation incorrectly.
I modeled the puzzle again, taking care to allow sufficient gaps between pieces and applying a consistent twist to the whole puzzle. Now the curves were accurate so the pieces fit together smoothly, but the gaps were too large so the pieces wouldn't hold together snugly.
This was an experiment with two new CAD programs, so I decided to build a simpler two-piece dissection as a learning exercise. I tried to compensate for the problems I'd encountered in the two previous samples. This puzzle emerged with an inconsistent twist, just like the red one, so the curves didn't quite match. Evidently I'd compensated in the wrong way.
Like the red one, the puzzle had to be forced past the mismatched curves. But then the pieces were unpleasantly loose because the gaps were too large. Again I had compensated incorrectly, so instead of avoiding the faults of the previous two samples this puzzle exhibited all the faults of both. Even so, that's a good sign because it confirms that these issues can be properly managed...I just got careless somewhere.
In the meantime I had tried to build a new revision of my flat maze puzzle, but I ran into trouble while cleaning the model. The outer layers had cleaned up nicely, just like the last two test models, but I was completely unable to clean the leftover material out of the middle layers. It clung stubbornly in the grooves.
In my last revision of this model I'd brought the two surfaces closer together so their respective grooves overlapped. That created continuous loops and circuits in the middle of the model, but these middle paths weren't completely accessible from either side...so the material couldn't be pulled out from either side.
In SDView I added an elaborate web of small peeling cuts inside the middle layers of the maze to isolate the material into pieces that could be pulled out from one side or the other.
But the layers didn't laminate together properly when I tried to build the model, so I canceled it halfway through because the plastic was starting to come apart. The last three versions of this model had built okay (other than entrapped material in the last) so I'm not sure whether this was just bad luck or an indication of some other fault. Maybe there are just too many cuts in the model, or maybe the cutting knife needs to be replaced.
Despite all these experimental failures, I think it was a very productive week!
Wednesday, January 25, 2012
Peppermint Candy puzzle refined
I took another stab at the Peppermint Candy puzzle which had been vulnerable to coming apart in unintended ways. I carefully refined the curves so each piece would 'reach around' to brace itself against the back side of the puzzle and made the walls thicker so it would be more rigid.
Honestly, I wasn't sure it would suffice. But it worked!
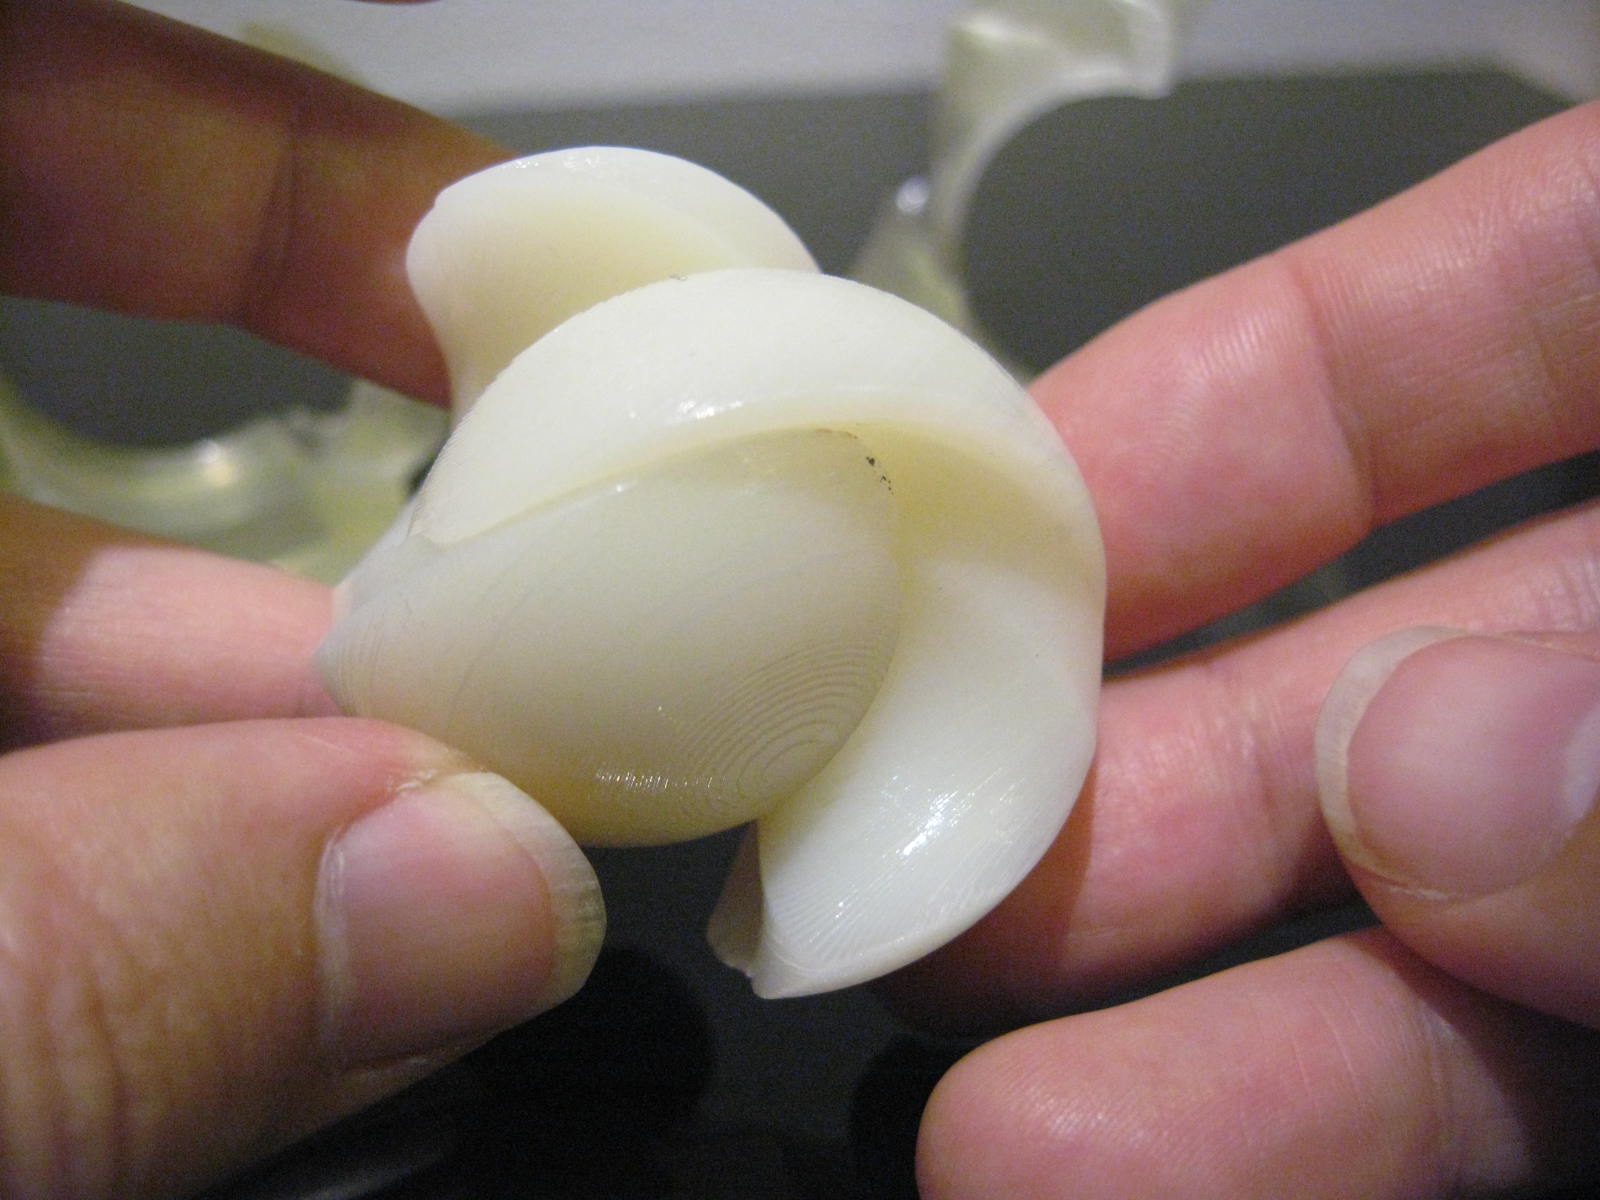
Here's the side with the ball sticking out. The cut in the ball is lined up with the cuts in the shell but it won't open in this position.
The other side of the puzzle looks about the same, but it has a white dome instead of an opening so the ball can't be seen from this side. The parting line forms an S-shape where it passes through the domed part.
Here's a video explanation of the puzzle in detail.
For comparison I ordered a test part built in SLS nylon. It's stiffer than the part built on the SD300, a good thing, but it lacks the contrasting colors. But the colors aren't just cosmetic; my testers thought the colors contributed to the challenge of solving the puzzle.
I built the ball pieces in a very specific orientation in order to put the colors exactly where I wanted them. Here's how the ball looks outside the puzzle shell.
Since the part required a specific build orientation I couldn't really position it for optimal post-processing. Each piece had a thin edge that would have been particularly vulnerable to chipping during cleaning, so I isolated that area in a little 'box' of peeling cuts.
Most of the layers in the isolated box fell away when the surrounding areas were cleaned, so it didn't make the cleaning work any slower. Except when I got to the thinnest part, the isolated box allowed me to gently peel away the last bits of material...leaving the thin edge smooth and intact. As usual, I solvent-dipped the parts to give them greater strength and a slick finish!
Honestly, I wasn't sure it would suffice. But it worked!
Here's the side with the ball sticking out. The cut in the ball is lined up with the cuts in the shell but it won't open in this position.
The other side of the puzzle looks about the same, but it has a white dome instead of an opening so the ball can't be seen from this side. The parting line forms an S-shape where it passes through the domed part.
Here's a video explanation of the puzzle in detail.
For comparison I ordered a test part built in SLS nylon. It's stiffer than the part built on the SD300, a good thing, but it lacks the contrasting colors. But the colors aren't just cosmetic; my testers thought the colors contributed to the challenge of solving the puzzle.
I built the ball pieces in a very specific orientation in order to put the colors exactly where I wanted them. Here's how the ball looks outside the puzzle shell.
Since the part required a specific build orientation I couldn't really position it for optimal post-processing. Each piece had a thin edge that would have been particularly vulnerable to chipping during cleaning, so I isolated that area in a little 'box' of peeling cuts.
Most of the layers in the isolated box fell away when the surrounding areas were cleaned, so it didn't make the cleaning work any slower. Except when I got to the thinnest part, the isolated box allowed me to gently peel away the last bits of material...leaving the thin edge smooth and intact. As usual, I solvent-dipped the parts to give them greater strength and a slick finish!
Sunday, August 7, 2011
Orange, Green, and Blue Marble
George Bell graciously took several sets of my Bag of Marbles puzzles to the International Puzzle Party in Berlin this year. Currently I have three styles of marbles, distinguished by color.

Orange Marble was my first design, a puzzle with two interlocking pieces that slide together unintuitively. It was created by accident as part of a design that I abandoned while studying Bram Cohen's Trapped Marble prototype. Although the two pieces are different from each other, they can be flipped relative to each other and they slide together symmetrically.

Green Marble is another two-piece design. This time the two pieces are identical, but they only fit together when the pieces are oriented in one specific orientation.

Blue Marble is based upon the same curves as Green Marble but divides a sphere into three pieces instead of merely two. Most people fit two of the pieces together easily, but instinctively try to insert the third piece upside-down...which doesn't work.

Here's how a batch of Blue Marble pieces looked shortly after I'd removed them from the SD300 and removed some of the support material.

Unprocessed pieces have a translucent sidewall finish. It's attractive, but I wanted a shinier smoother finish.

To smooth the side walls I dipped each piece in Weld-On 2007 solvent for 30 seconds.

After their solvent bath I laid the pieces on baker's parchment to dry. Parchment is non-absorbent and the wet pieces don't stick to it, so it's an ideal disposable drying surface.

Eventually I plan to add other Marble styles (and colors) to the series as I think of new challenging features to add.
Orange Marble was my first design, a puzzle with two interlocking pieces that slide together unintuitively. It was created by accident as part of a design that I abandoned while studying Bram Cohen's Trapped Marble prototype. Although the two pieces are different from each other, they can be flipped relative to each other and they slide together symmetrically.
Green Marble is another two-piece design. This time the two pieces are identical, but they only fit together when the pieces are oriented in one specific orientation.
Blue Marble is based upon the same curves as Green Marble but divides a sphere into three pieces instead of merely two. Most people fit two of the pieces together easily, but instinctively try to insert the third piece upside-down...which doesn't work.
Here's how a batch of Blue Marble pieces looked shortly after I'd removed them from the SD300 and removed some of the support material.
Unprocessed pieces have a translucent sidewall finish. It's attractive, but I wanted a shinier smoother finish.
To smooth the side walls I dipped each piece in Weld-On 2007 solvent for 30 seconds.
After their solvent bath I laid the pieces on baker's parchment to dry. Parchment is non-absorbent and the wet pieces don't stick to it, so it's an ideal disposable drying surface.
Eventually I plan to add other Marble styles (and colors) to the series as I think of new challenging features to add.
Friday, February 25, 2011
Adding color between layers
The SD300 doesn't currently offer green material, so someone recently asked how I made the green marble I pictured in previous post in November. I had been experimenting with applying color during the build, a technique I recently repeated to produce three variously-colored marbles during a single build.

I stopped the SD300 about half way through building a batch of marbles, and applied colored markers to the interior of the models where the next layer was about to be welded on.

The ink was applied after the machine and finished applying Anti-Glue, but immediately before it ironed the next sheet. This timing ensures the machine won't come into contact with the ink, thereby protecting the cutting knife and Anti-Glue pens from contamination. My SDPause utility stops the machine at the right time.

Even though they've only been tinted only between two layers, the finished parts vibrantly exude color due to the translucent behavior of the material. That's all just a lighting effect: ink didn't (and couldn't) bleed between layers.
I stopped the SD300 about half way through building a batch of marbles, and applied colored markers to the interior of the models where the next layer was about to be welded on.
The ink was applied after the machine and finished applying Anti-Glue, but immediately before it ironed the next sheet. This timing ensures the machine won't come into contact with the ink, thereby protecting the cutting knife and Anti-Glue pens from contamination. My SDPause utility stops the machine at the right time.
Even though they've only been tinted only between two layers, the finished parts vibrantly exude color due to the translucent behavior of the material. That's all just a lighting effect: ink didn't (and couldn't) bleed between layers.
Monday, February 14, 2011
Light pipes via transparency
Inverting some previous builds I've been embedding a transparent band within opaque parts, such as these Puzzle Sphere pieces. The transparent band can act as a light pipe. There's another picture here of the assembled puzzle.

Similarly I built a batch of various Marble puzzles with embedded clear bands.

Here's one piece on a light table, showing how the clear band transmits light.

When two pieces are assembled into a Marble, the clear band in one piece transmits light through the other.

Here's an unrelated part I happened to build at the same time. It's a purely mechanical part, but it also includes a transparent band because the SD300 was building it with the same materials as the Marbles. The color-change doesn't affect the strength of the part.
Similarly I built a batch of various Marble puzzles with embedded clear bands.
Here's one piece on a light table, showing how the clear band transmits light.
When two pieces are assembled into a Marble, the clear band in one piece transmits light through the other.
Here's an unrelated part I happened to build at the same time. It's a purely mechanical part, but it also includes a transparent band because the SD300 was building it with the same materials as the Marbles. The color-change doesn't affect the strength of the part.
Monday, November 8, 2010
More marbles?
Maybe I'm stuck in a rut, but I've built a substantial number of test marbles using various build orientations, color schemes, and tolerances.

Some are twisted in the reverse direction. I plan to use them as building blocks for a larger puzzle by gluing some halves back-to-back so they have to be attached to other parts in a specific way.

Despite all the different tolerances, the pieces are similar enough to mix-and-match. When two halves are joined into a single marble they usually hold together firmly, but some pairings will spontaneously disassemble themselves as captured in this video.
Some are twisted in the reverse direction. I plan to use them as building blocks for a larger puzzle by gluing some halves back-to-back so they have to be attached to other parts in a specific way.
Despite all the different tolerances, the pieces are similar enough to mix-and-match. When two halves are joined into a single marble they usually hold together firmly, but some pairings will spontaneously disassemble themselves as captured in this video.
Saturday, October 30, 2010
Isolated Marble, rev 2
I refined the curves and angles in yesterday's Isolated Marble prototype and built another today. I gave the model a black stripe to distinguish it from the previous model by changing to black material for 6 layers part way through the build.

It works better than the previous revision, but it reveals more details that need refinement.

The curve was supposed to be smooth, but it exhibits a rough texture like a washboard. That's not a build problem, it's an interference pattern in the source data. A silly mistake, but it'll be easily fixed.
It works better than the previous revision, but it reveals more details that need refinement.
The curve was supposed to be smooth, but it exhibits a rough texture like a washboard. That's not a build problem, it's an interference pattern in the source data. A silly mistake, but it'll be easily fixed.
Friday, October 29, 2010
Isolated Marble, a work-in-progress
Some time ago I tried to develop a variation of Bram Cohen's Trapped Marble puzzle, which is now being sold by Hanayama Ltd as Cast Marble. I tried to modify the cuts as radically as possible, but the puzzle as a whole behaved just like Cohen's original. It apparently lacked novelty, so I stopped working on it.

The challenge in Bram Cohen's original puzzle was to assemble all four pieces; there was no challenge assembling the two-piece marble without the rest of the puzzle. But in the following months, many people have been confounded by the central 'marble' from my prototype. It just doesn't go together as people expect.

The secret to assembling the marble by itself is to withdraw the parts farther than you might intuitively expect, until they elegantly nest and join together. My four piece prototype had been designed to be assembled from a widely-separated orientation, but I hadn't anticipated the two central 'marble' pieces would retain this behavior without the other two pieces. It turns out to be a satisfying puzzle all by itself!

So I've begun exploring designs for a two-piece marble puzzle. To help distinguish each batch of prototypes I briefly installed red PVC for several layers in the middle of the build, which gave these parts a red stripe. For subsequent prototypes I will try swapping-in small amounts of other colors, again to uniquely identify each build.
The challenge in Bram Cohen's original puzzle was to assemble all four pieces; there was no challenge assembling the two-piece marble without the rest of the puzzle. But in the following months, many people have been confounded by the central 'marble' from my prototype. It just doesn't go together as people expect.
The secret to assembling the marble by itself is to withdraw the parts farther than you might intuitively expect, until they elegantly nest and join together. My four piece prototype had been designed to be assembled from a widely-separated orientation, but I hadn't anticipated the two central 'marble' pieces would retain this behavior without the other two pieces. It turns out to be a satisfying puzzle all by itself!
So I've begun exploring designs for a two-piece marble puzzle. To help distinguish each batch of prototypes I briefly installed red PVC for several layers in the middle of the build, which gave these parts a red stripe. For subsequent prototypes I will try swapping-in small amounts of other colors, again to uniquely identify each build.
Subscribe to:
Posts (Atom)