Showing posts with label dissection. Show all posts

Friday, July 13, 2012

Indian Rupee Sign, Rev. 2

My first attempt at making the Indian Rupee into a letter-dissection puzzle was an interesting puzzle-design exercise, but it yielded a fairly uninspired puzzle.  I had designed a frame for the puzzle because most people aren't very familiar with the shape of the Indian Rupee sign, but the frame just made it that much easier to solve.

But I sensed a puzzle in that shape, so I drafted and modified the outlines to explore relationships between all the lines, curves, and angles.  Hidden relationships emerged as the shape evolved.

A new puzzle emerged with so many similar curves and angles that 8 of the 9 pieces could fit together without any of them being correctly positioned.  But was it a good puzzle?  No, not really.  My friends had no trouble identifying the correct positions, and some of them couldn't even discover those "wrong" positions without considerable effort!

The puzzle at right is solved correctly, while the puzzle at left is shown with all the pieces in wrong positions.  It was a failure, but a very instructive one.  So, could I re-design the puzzle so the correct positions were more like those in the puzzle at left?

Starting from scratch I designed a new layout, paying close attention to feedback from my testers.  What emerged was a dissection of a Rupee sign into just eight pieces.  Each piece fits into the frame in more than one location, but most look like there's only one possible place to put them--and it's usually the wrong place!

The classic T letter dissection puzzle requires four pieces for its relatively simple shape, so I'm thrilled to dissect such a complex shape as the Rupee sign with just twice as many pieces.  I had to allow some wacky variations in shape and size, but it works.  Moreover, the frame actually enhances the challenge by discouraging the user from removing pieces that might have been incorrectly placed!

Tuesday, February 7, 2012

Rupee Puzzle, rev. 1

India recently adopted a currency symbol for their rupee, which elegantly combines elements of the Devanagari letter र with a Latin letter R.  I dissected the shape into a puzzle with carefully-disguised cuts like other, traditional letter-dissection puzzles.  My effort was concentrated on the complex shapes in the upper part of the Rupee symbol, but the lower part was somewhat hastily finished.


I built my first test model in one piece, but with built-in dividing lines.

After confirming that the overall shape was recognizable I snapped the pieces apart along the pre-cut dividing lines.

It might be very difficult to assemble such a complex shape, so I also built and tested a plastic frame that might be used as a template to help someone assemble the shape.  It's a successful proof-of-concept but I'm dissatisfied with the overall shape because it lacks angled serifs on the two bars and the lower leg ought to be connected differently.

In the future I will try to develop a better Rupee dissection that incorporates the aforementioned stylistic features.  In the meantime I decided to practice by re-creating traditional dissection puzzle of the letter T.  This basic puzzle has been around for a century or more, but it continues to stump people despite its apparent simplicity.  Since it's an old design I shared the STL files for the T puzzle as "public domain" at Thingiverse.

Rob's Puzzle Page has some interesting pictures of other dissected-letter puzzles here.

Tuesday, November 8, 2011

Helical Burr Experiment

After seeing my Rhombic Dodecahedron Puzzle Bram Cohen casually suggested a puzzle in which one particular piece has to be put in last.  That is to say, a puzzle in which the pieces must be assembled in a particular sequence.

The picture above shows how the idea might be adapted to one of my swirly 'marble' puzzles: the four pieces must be assembled in the sequence illustrated above because each new piece blocks the movements of the previously installed pieces.

Anxious to try it out, I built a set of pieces without checking their dimensions.  But I encountered some delicate, thin walls while I was peeling the models out of the support material.

 VisCAM revealed some astonishingly thin, wispy structures on the thinnest piece.  Some of the walls taper down to less than 0.1mm near some of the edges.  It held together only because the super-thin portions are anchored to the thicker 'backbone' up the center!
It took a lot of slow, cautious work to free this thin part from the leftover plastic but it came out intact!  Dipping the piece in plastic-welding solvent made it strong enough for functional testing, despite a few frayed-looking edges where the walls taper down to nothing.


Reviewing the measurements it became clear that the super-thin walls had occurred as a result of how two spiral-shaped channels gradually converged inside the puzzle.  Luckily the thin piece would be amply protected by the thicker piece when the puzzle is assembled.
As I'd hoped, the pieces can only be assembled in a specific sequence.  But unfortunately they fit together too tightly, so the last piece wouldn't go in.
I tried to improve the fit by sanding the pieces, but the PVC is just too soft for hand sanding so I resorted to a high-speeed abrasive wheel.  This improved the fit and gave the pieces a nice smooth feel.

Perhaps it's a bad habit to keep building models with such thin walls, as they're extremely vulnerable to breakage while cleaning the model.  But even though they could break during manual cleanup, they don't pose any sort of danger to the build process so the main penalty is the tedious labor.  The SD300 can safely attempt any sort of ridiculous geometry, even if the STL file is riddled with defects, and the worst that might happen is the model might be disintegrate or consume excessive labor during post-build cleaning.

Thursday, October 13, 2011

Rhombic Dodecahedron Puzzle

I just shared a simple Rhombic Dodecahedron Puzzle at Thingiverse, consisting of four identical pieces that fit together to form a solid shape.  The concept is very similar to my previous marble puzzles and cubic trisections, but using four parts instead of just two or three.

The idea of using a shape with four-way symmetry was inspired by George Hart's Air puzzle, which is described on his web site and briefly demonstrated in a YouTube video by Roxanne Wong.

Like my previous dissection puzzles, the pieces have a distinct orientation so they only fit together if they're all pointed the same direction.  Technically that means my puzzle only one-eighth as many duplicate solutions as Air but that doesn't mean it's any harder to solve.

Here's a video that demonstrates how the puzzle works.

Sunday, August 7, 2011

Orange, Green, and Blue Marble

George Bell graciously took several sets of my Bag of Marbles puzzles to the International Puzzle Party in Berlin this year. Currently I have three styles of marbles, distinguished by color.


Orange Marble was my first design, a puzzle with two interlocking pieces that slide together unintuitively. It was created by accident as part of a design that I abandoned while studying Bram Cohen's Trapped Marble prototype. Although the two pieces are different from each other, they can be flipped relative to each other and they slide together symmetrically.


Green Marble is another two-piece design. This time the two pieces are identical, but they only fit together when the pieces are oriented in one specific orientation.


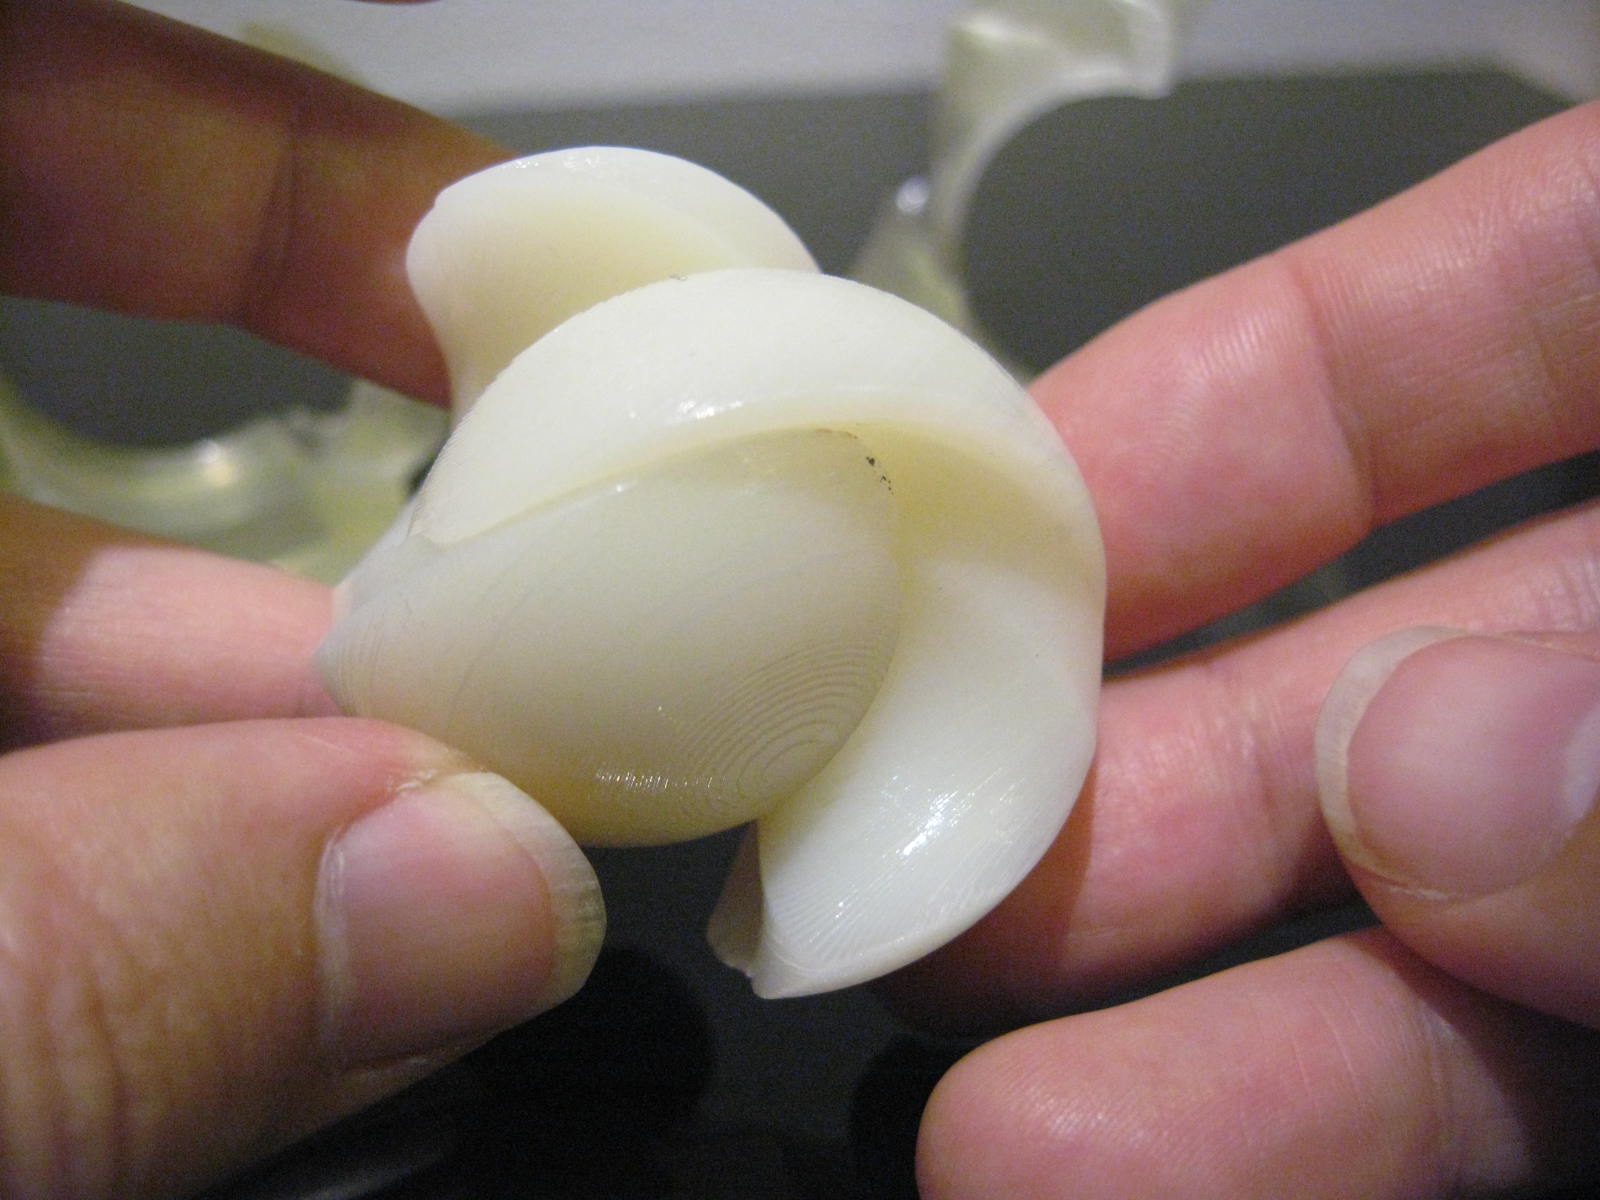
Blue Marble is based upon the same curves as Green Marble but divides a sphere into three pieces instead of merely two. Most people fit two of the pieces together easily, but instinctively try to insert the third piece upside-down...which doesn't work.


Here's how a batch of Blue Marble pieces looked shortly after I'd removed them from the SD300 and removed some of the support material.


Unprocessed pieces have a translucent sidewall finish. It's attractive, but I wanted a shinier smoother finish.


To smooth the side walls I dipped each piece in Weld-On 2007 solvent for 30 seconds.


After their solvent bath I laid the pieces on baker's parchment to dry. Parchment is non-absorbent and the wet pieces don't stick to it, so it's an ideal disposable drying surface.


Eventually I plan to add other Marble styles (and colors) to the series as I think of new challenging features to add.

Thursday, March 31, 2011

Twirlicue Puzzle Pendant

Shapeways built my Twirlicue pendant in solid silver and I received the parts today.


The two pieces can be assembled so they merge together into a slender, twirly shape like this. It looks simple enough, but there's only one way to put it together so it's a bit trickier than it looks!


Here's the finished Twirlicue pendant compared with the first prototype I'd built on the SD300. I enlarged the silver model over the original design because it was hard to hold onto.


The assembled pendant can be hung from a chain or cord and worn as a necklace.


Shapeways sells each piece for $44 USD (plus $10 for an optional polished finish) and it takes two piece to form a complete Twirlicue Pendant so it's not a dirt-cheap puzzle. But it's pretty!

Sunday, March 13, 2011

Twirlicue prototype

On Thursday I learned Shapeways has permanently added solid silver to their material choices. Plenty of service bureaus offer precious metals, but Shapeways makes it so hassle-free that I wanted to devise something new just to exploit their new capability.


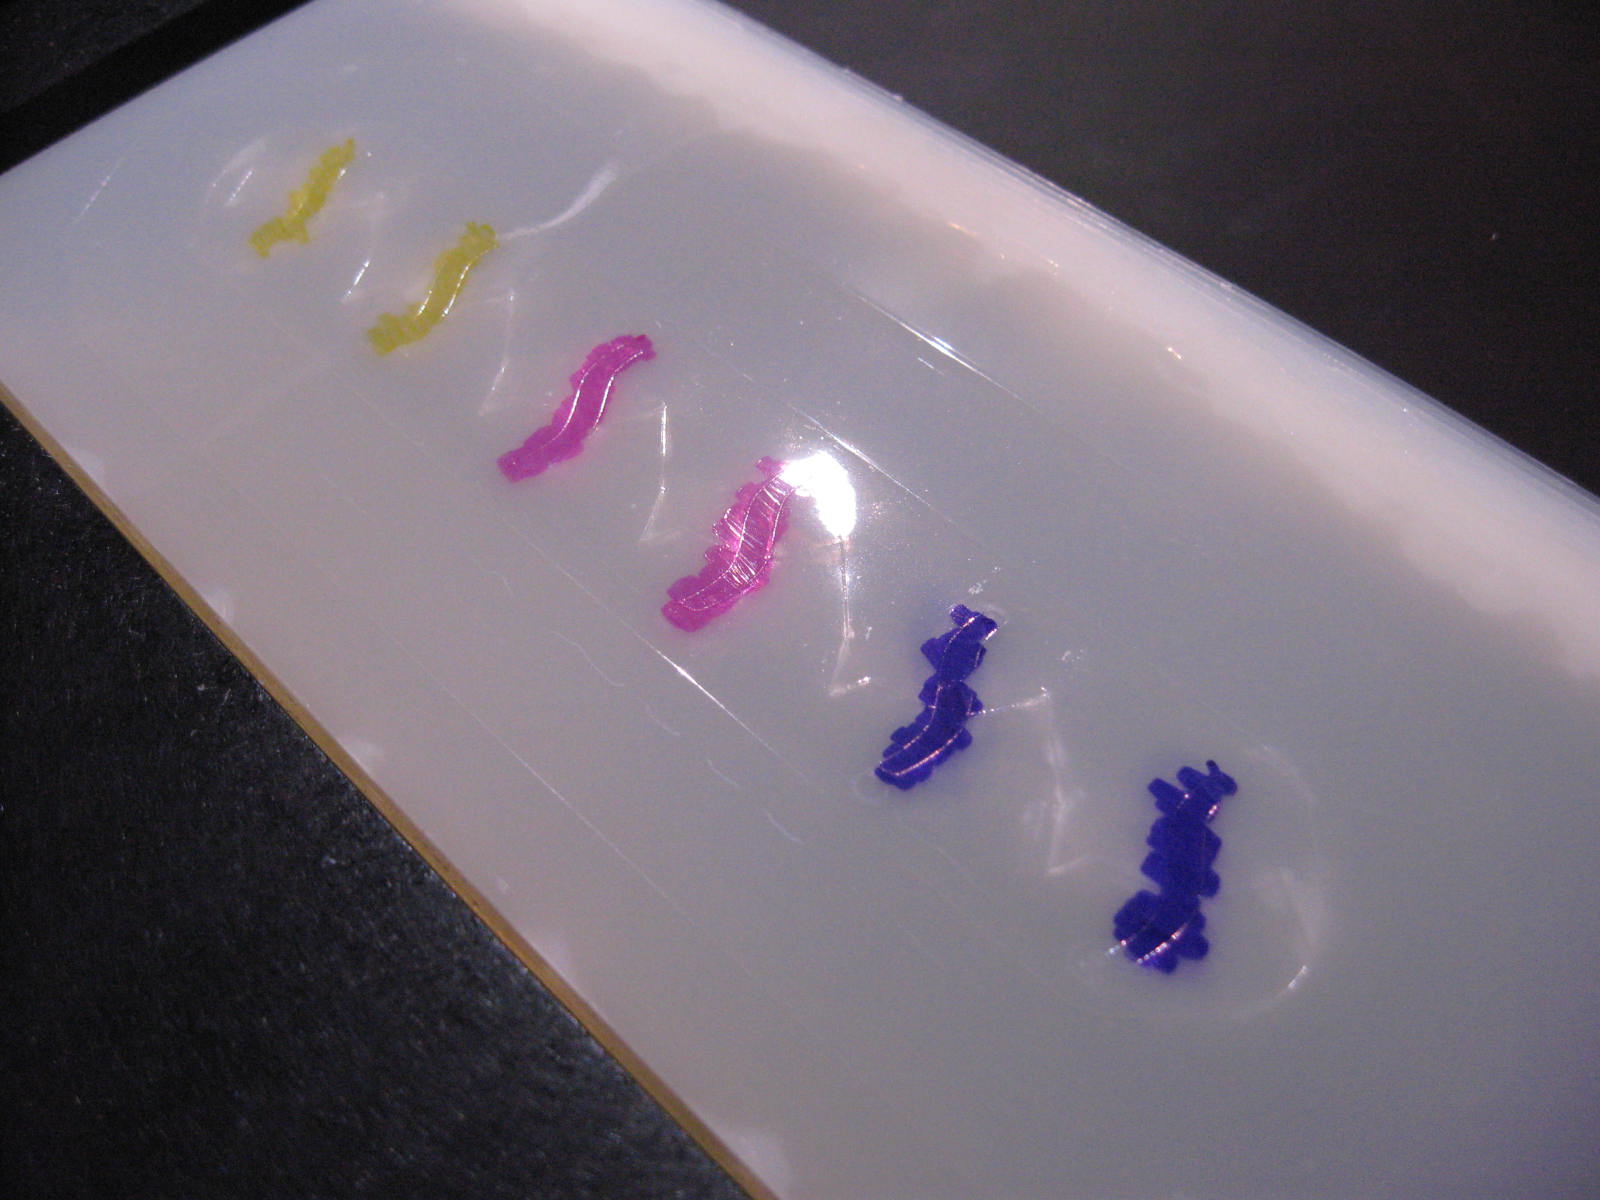
I designed a twirly shape that resembles a twisted potato chip, which is intended to be both a puzzle and a pendant. I built test models on the SD300 before sending it off to Shapeways. Just experimenting, I tinted the models by applying permanent markers to the exposed surface partway through the build process.


Here are the colored markers beside the finished parts. A visual illusion makes it seem as though the colors 'bleed' through the layers, but that's just an optical behavior of the transparent material.


I designed the models to be exceedingly thin because silver is such an expensive material, so these test models are also very thin. Consequently a piece broke away from one of the models when I was cleaning it.


The 'puzzle' is to assemble two pieces as shown here, which will allow them to be strung onto a necklace chain. The chain is a 1mm Sterling Silver box-link chain.


Here's another view showing how tiny and thin the test parts are compared to a US one-cent coin. I don't ordinarily build such thin parts on the SD300 because they require a huge investment of extra attention to remove the supports. It took at least an extra hour to clean these six parts, and I broke one.

Friday, February 25, 2011

Adding color between layers

The SD300 doesn't currently offer green material, so someone recently asked how I made the green marble I pictured in previous post in November. I had been experimenting with applying color during the build, a technique I recently repeated to produce three variously-colored marbles during a single build.


I stopped the SD300 about half way through building a batch of marbles, and applied colored markers to the interior of the models where the next layer was about to be welded on.


The ink was applied after the machine and finished applying Anti-Glue, but immediately before it ironed the next sheet. This timing ensures the machine won't come into contact with the ink, thereby protecting the cutting knife and Anti-Glue pens from contamination. My SDPause utility stops the machine at the right time.


Even though they've only been tinted only between two layers, the finished parts vibrantly exude color due to the translucent behavior of the material. That's all just a lighting effect: ink didn't (and couldn't) bleed between layers.

Monday, November 8, 2010

More marbles?

Maybe I'm stuck in a rut, but I've built a substantial number of test marbles using various build orientations, color schemes, and tolerances.


Some are twisted in the reverse direction. I plan to use them as building blocks for a larger puzzle by gluing some halves back-to-back so they have to be attached to other parts in a specific way.


Despite all the different tolerances, the pieces are similar enough to mix-and-match. When two halves are joined into a single marble they usually hold together firmly, but some pairings will spontaneously disassemble themselves as captured in this video.

Saturday, October 30, 2010

Isolated Marble, rev 2

I refined the curves and angles in yesterday's Isolated Marble prototype and built another today. I gave the model a black stripe to distinguish it from the previous model by changing to black material for 6 layers part way through the build.


It works better than the previous revision, but it reveals more details that need refinement.


The curve was supposed to be smooth, but it exhibits a rough texture like a washboard. That's not a build problem, it's an interference pattern in the source data. A silly mistake, but it'll be easily fixed.

Friday, October 29, 2010

Isolated Marble, a work-in-progress

Some time ago I tried to develop a variation of Bram Cohen's Trapped Marble puzzle, which is now being sold by Hanayama Ltd as Cast Marble. I tried to modify the cuts as radically as possible, but the puzzle as a whole behaved just like Cohen's original. It apparently lacked novelty, so I stopped working on it.


The challenge in Bram Cohen's original puzzle was to assemble all four pieces; there was no challenge assembling the two-piece marble without the rest of the puzzle. But in the following months, many people have been confounded by the central 'marble' from my prototype. It just doesn't go together as people expect.


The secret to assembling the marble by itself is to withdraw the parts farther than you might intuitively expect, until they elegantly nest and join together. My four piece prototype had been designed to be assembled from a widely-separated orientation, but I hadn't anticipated the two central 'marble' pieces would retain this behavior without the other two pieces. It turns out to be a satisfying puzzle all by itself!


So I've begun exploring designs for a two-piece marble puzzle. To help distinguish each batch of prototypes I briefly installed red PVC for several layers in the middle of the build, which gave these parts a red stripe. For subsequent prototypes I will try swapping-in small amounts of other colors, again to uniquely identify each build.