Wednesday, October 2, 2013

More Nuts and Bolts

My Its' Nuts toy went on sale at Grand Illusions last month.  Their initial inventory quickly sold out after it appeared in their monthly newsletter, so I made another batch on the SD300 to enable them to restock.

Grand Illusions is a web store packed with all sorts of deceptive novelties, plus an online toy museum and gallery.


Here's a video about Its' Nuts featuring Tim Rowett, an extraordinary toy collector who had purchased a copy of the toy directly from me last year at the International Puzzle Party 32 in Washington, DC.


Puzzle designer Evgeniy Grigoriev created his own version, which he titled the Incredible Screw.  Grigoriev is famous for his twisty-cube puzzles, and twice set the record for building the World's Smallest Rubik's Cube.  On his version, notice how the nuts move at different rates when he turns the bolt!


Matt Ruggles independently designed his own version, which can be downloaded from Thingiverse for anyone who wants to build it.  Here's a picture comparing my original model (left) with his design (right).

Friday, August 23, 2013

IPP Pictures of Puzzle Enthusiasts taking pictures of Puzzle Enthusiasts

Lots of people took pictures at IPP, so here are some pictures of the people who took pictures.

Friday, August 2, 2013

Puzzle Party: IPP33 Opens


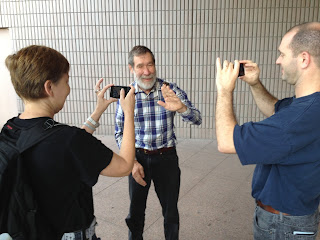
When I arrived in Japan for the International Puzzle Party many other puzzlers had already been there for quite some time, and they'd been out sightseeing and visiting.  I joined a small group of friends on an unofficial trip to visit a few puzzle sights, including (pictured above) George Miller, Roxanne Wong (wearing my ivy cap) and her daughter Katherine, and Naoki Takashima.

First we visited Takafumi Haseda, who operates the Tribox puzzle store online.  The store operates in a residential apartment converted into an office, a photo studio, and a stockroom packed with puzzle merchandise.  Pictured, Andreas Nortmann (too tall!), Roxanne, and Takafumi venture into the stock room search for hidden treasures.

Next we trekked to the office of Hanayama, the maker of the world's finest mass-produced brainteaser puzzles.  Above, Oskar van Deventer and his wife discovered a sign that greeted his arrival outside the Hanayama office.

A room at Hanayama displayed their huge assortment of Japanese toys and games, in addition to their world renown collections of cast puzzles.

Our next destination would have been Puzzle Shop Torito, but the shop was scheduled to be closed for a few days.  So we went sightseeing to the 2080-foot-high Tokyo SkyTree.

From the SkyTree we observed a puzzling building that exhibited an illusion like an MC Escher painting: the green roof appears to wrap around the two elevator towers in the center of the building, but the elevetor towers clearly connect to the green roof at different floors!

There's a glass floor for intrepid visitors willing to stand on thin air over 1000' above ground.

Back at the hotel, Dirk Weber successfully solved my Twisty Trillion puzzle.


Hanayama Puzzles exhibited a fascinating display that showed how many of their most famous puzzles evolved before they went into production.

My favorite entry in the 2013 Design Competition was Bram Cohen's Galaxy, which won a jury prize.  It went on to be manufactured by Hanayama Puzzles, widely sold by puzzle stores like Puzzle Master.

Monday, July 29, 2013

Rundown of puzzles for IPP33

Peppermint, my entry for the puzzle exchange, was digitally manufactured in colorful ABS by Bradley Rigdon at PrintTo3D.  I built prototypes on my SD300, those PVC models were a bit too flexible to give the right "feel" for this particular puzzle.  Each piece is made in two colors, red and white; the colors play a subtle but important role.

 Moiré Maze combines laser-cut acrylic and 3D printed vinyl.  The challenge is to guide a small magnet through the maze from Start to Finish.  That goal sounds simple enough, but it's easy to get lost in the visually-confounding patterns of rings reflected against a mirrored background.

Cubic Trisection is one of the puzzles I also sold at IPP32 last year.  The challenge is to assemble the three pieces into a cube, as shown.  All three pieces are identical, but not symmetrical.  Most users easily assemble the first two pieces, but encounter trouble adding the third.

Puckup is a two-piece assembly puzzle, which I'm selling in transparent material or a red-white color scheme.  Tyler Barrett suggested a somewhat edgier name "What the Puck" but the simpler Puckup name had already been picked up on one of the puzzle forums.

Twisty Trillion is a successor to Puckup whose shape provokes a lot more confusion among users.  Neither puzzle is fiendishly difficult, but Twisty Trillion takes most people a whole lot longer to figure out.  I built them all on the SD300 using transparent vinyl because light reflects attractively inside the puzzle.

I commissioned two copies of a Trillion Pendant to be built as puzzle jewelry--one in brass from i.Materialise, the other in silver from Shapeways.  But neither model was delivered on time--Shapeways lost one of the pieces, and i.Materialise is over 3 weeks behind schedule.  So I salvaged the partly-incomplete silver model by building its other half in luxuriously-dark blue vinyl, which contrasts gracefully with the silver piece.  Frankly, it looks nicer than it would have if both pieces had been silver!

Here's a colorful assortment of marble puzzles, three of which will be available for sale as Bag of Marbles.  The others are experimental designs, which I'd like to test on a few puzzlers at IPP.  In particular, the pink and purple models are two closely-related designs, but my first few testers think the purple one is much harder than the pink one.  Will others react the same way?  IPP is a great opportunity to find out!

Monday, July 22, 2013

More on Moiré

I previously wrote about my Moiré Maze puzzle as if it was finished, but it had all sorts of unfinished details until this weekend.  For example I didn't have suitable packaging until George Bell referred me to Clear Bags which supplied the attractive box pictured above.

I built this inexpensive plastic insert on the SD300 to hold the puzzle safely inside the box.


The closeup above emphasizes two more gripes:
  • The Start and Finish are denoted by two bulb-shaped chambers, but there aren't any markings to identify which is which.  I suppose I could supply an instruction sheet, but it could get lost.
  • It really needed some sort of mechanism or barrier to keep the chambers separate, to prevent the user from trivially moving the magnet from Start to Finish without tracing the maze.  The acrylic cutting pattern included an eyelet for attaching such a mechanism, but how should I use it?
 
To add markings to the puzzle, I used a KNK Zing plotter-engraver I had recently purchased.  The machine can't handle the bare acrylic pieces so I 3D-printed a template and taped it to a large piece of poster paper, which the machine happily accepted.

To calibrate the KNK Zing to the acrylic sheet, I aligned the the engraver's laser-pointer with a small hole in the 3D-printed template/holder.  And I installed a diamond-tipped engraving tool into the plotter.
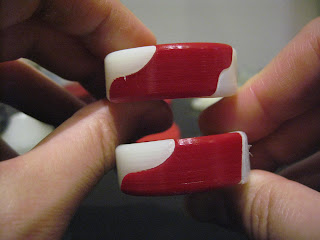
Start and Finish are clearly identified after engraving.

And I installed a one-way vinyl flap that permits the magnet to be pulled from the Finish chamber to the Start chamber.  It doesn't let the magnet slide the other way.  The only way to travel from the Start to the Finish is to navigate the maze.

Wednesday, June 12, 2013

What should I name this puzzle?

It pays to share with non-puzzlers.  This puzzle was inspired by a non-puzzler's comments on a study model, and it reached completion in just a few days.  And it's remarkably ideal for building on my SD300 because it can mass-produce them quickly, easily, and economically.

 It began when I shared this geometric model with my coworkers--several people enjoyed playing with it.  It's not really a puzzle, but when they took it apart they had trouble putting it back together.  One coworker attributed it to the circular shape, the most distinguishable feature when the pieces are apart, because it encourages the user to instinctively follow the wrong contours.

His comments let me to design this puzzle with two congruent pieces, whose circular shape and curved surfaces are intended to mislead the user.  This is a breakthrough puzzle for me because it's my first that uses congruent pieces that exhibit symmetry relative to each other, yet it has only one unique solution out of the four permutations in which the pieces could be oriented.

 The side walls give a small hint at how it works.  Not much, though.

I'd originally planned it as a colorful opaque puzzle, with an appearance like a bonbon.  But it looks stunning in the SD300's transparent material, which shows off the delicate internal contours when the puzzle is assembled.

I'm also experimenting with other applications of these principles.  This trillion-shaped puzzle has contours that imply 3 axes of rotation, running through each of the 3 corners.  Naturally that's not really possible, but the illusion is sufficiently distracting that my testers had a really hard time with it.

Wednesday, May 29, 2013

Not-so-wonderful Waterful

Inspired by a wasp trap, a friend suggested a water-filled dexterity puzzle that challenges the user to guide a floating ball into an inverted funnel.  It's a cool idea, but why not use two balls: one that floats and another that sinks.  I designed a two-piece box that had transparent windows and two funnel-shaped goals.


I put two little balls inside and sealed it full of water.  One ball is polypropylene, which floats, while the other is made of PTFE, which sinks.  The challenge is to get the floating ball into the funnel at the top and the sinking ball into the funnel at the bottom--at the same time!  My first test model seemed to work perfectly.


Problem!  The PVC windows gradually fogged up as the PVC absorbed moisure.  After a couple of days it turned completely opaque.  This effect is reversible: it turns transparent again if it dries out, but the puzzle needs to be filled with water so this design just wasn't practical.


So I tried a different approach: I incorporated the funnels into two caps that could be bonded to a piece of acrylic tubing.  Acrylic doesn't absorb moisture so it would stay crystal clear, right?  I assembled a test model and filled it through a fine needle and sealed it up.


This worked much better: the side walls were perfectly clear and the cylindrical shape worked like a lens.  Here's how it looks when solved, with the floating ball in the funnel at top (barely visible) and the sinking ball in the bottom funnel.  At first it seemed perfect: no fogging, no bubbles!


But a small bubble appeared a few days later, and gradually grew.  After two months it had grown so large that it interfered with the balls, and it's obviously going to keep growing.  So this won't work, either.

Although the containers seem to be watertight--no leaks--I'm guessing the PVC isn't vaportight.  So the water vapor could be escaping by diffusion through the PVC end caps.  But my coworkers liked this puzzle while it worked, so it's worth another try.  Back to the drawing board!

Tuesday, May 28, 2013

SD300 Issues from emails

Through email I've learned a lot of tricks and solutions to SD300 issues.  Occasionally I've relayed a solution from one user to another, who then devises an improvement of his own.


A user in Romania found his Anti-Glue cartridge had dried out while the machine wasn't being used, so here's a trick I learned from a British user: add water to the cartridge by injecting it into the breather hole with a syringe or needle-tipped squeeze bottle.  (49 gauge fits)  One user drilled a larger hole and refilled it through a funnel.

This technique could also be used to extend the life of an Anti-Glue cartridge in case you've spoiled one.

Occasionally users have reported an odd phenomenon where unused support material doesn't tear away cleanly because the layers are stuck together and the unused plastic has a gooey, melted texture.  I'm not sure it's the same, but I recently experienced something like it while cleaning the model in the picture.  Most of this material is unused support material.  It should all be shiny like the area at lower left.  The problem area is at top-right, which didn't peel away cleanly.  Each layer of unused material was littered with tiny spots that were tightly bonded to the layers underneath--and it appears that the shiny Anti-Glue film was interrupted by little spots where the layers were unintentionally glued together.

My first theory was glue might have dripped after ironing a new layer to the top of the model block, as pictured in this previous post.  So I watched the machine carefully during the next build.  No droplets.  But when the machine applied Anti-Glue there were spots in the film--holes through which glue might unintentionally bond the base layer to the model and support material.

I watched more carefully as the machine ironed the next layer of material, and noticed it already had smears of glue across the top surface--right out of the feeder!  How was that even possible?

Aha!  There were scraps of plastic clinging to the underside of the iron bridge, which contains the jets that spread glue on the top of the model.  My current theory is that those scraps hung down enough to touch the PVC as it was being rewound into the feeder, drawing glue into the feeder by simple capillary action.  Right or wrong, the issue hasn't occurred since I cleaned around the glue jets underneath the iron bridge.

It's not obvious how to get access to inspect and clean the underside of the iron bridge so I made a video.

Saturday, March 9, 2013

Puzzle Overview: Moiré Maze

I've previously posted about the development of Moiré Maze so here's an overview of how it works as a puzzle.  There are a few clues about its solution but no spoilers.

At left is Oskar's Boston Subway puzzle from 2006.  It's a sandwich of acrylic sheets containing laser-cut channels; the bottom layer has 10 parallel channels running north-south and the top layer contains 10 parallel channels running east-west.  It's a criss-cross grid.  There's a layer in between that selectively connects the top and bottom grids at some places, thereby turning it into a puzzling maze.  George Miller constructed the puzzles and put inside a small magnet the user can guide through the maze using a magnetized wand.

It occurred to me to build a similar layered maze using circles instead of straight lines.  Ultimately I developed two layers of concentric ring-shaped channels, one over the other as depicted at left.  The layer at right is sandwiched between the other two layers to selectively allow the user to transfer between the two sets of rings like a maze.

The layers are stacked like this with a mirror on the bottom and a transparent cover on top.  I carefully selected a combination of layer thicknesses and a much thinner magnet to prevent the magnet from becoming turning sideways and becoming wedged between layers, a nuisance Boston Subway sometimes exhibited.

Laser cut acrylic comes with a protective film over the surface.  To avoid getting dust and fingerprints on the layers inside the puzzle, I only removed the protective film after each layer had been assembled into the puzzle.

But there's more to this puzzle than a mere shape variation on Boston Subway--it introduces a visual subterfuge that misdirects the user away from the solution.  The critical secret is plainly visible, even in the photo, but it's tough for a viewer to choose to see it once their mind has resolved the image.  Some testers couldn't even force themselves to see it when the solution was shown to them.

In Boston Subway it was sometimes difficult to locate the little silvery magnet because it reflected the same colors as the neutral mirror and irridescent sheets.  I chose to use a bronze-colored mirror with Moiré Maze to enhance the contrast, so the silver magnet is easier to distinguish against the bronze-tinted background.

As a final touch I gave Moiré Maze a built-in stand that secures the layers and holds the puzzle at a convenient slope for playing.  Initially I'd planned to make the stand with laser-cut acrylic like the rest of the puzzle, but after some experimentation I substituted dark-blue pieces 3D-printed from my SD300 because the PVC material is so resilient that it can squeeze the acrylic sheets tightly together.  If I had made those piece of acrylic, then the stand's outer pieces would be strained in tension and would thus be vulnerable to breakage--acrylic tends to fracture under stress.