Thursday, October 13, 2011

Rhombic Dodecahedron Puzzle

I just shared a simple Rhombic Dodecahedron Puzzle at Thingiverse, consisting of four identical pieces that fit together to form a solid shape.  The concept is very similar to my previous marble puzzles and cubic trisections, but using four parts instead of just two or three.

The idea of using a shape with four-way symmetry was inspired by George Hart's Air puzzle, which is described on his web site and briefly demonstrated in a YouTube video by Roxanne Wong.

Like my previous dissection puzzles, the pieces have a distinct orientation so they only fit together if they're all pointed the same direction.  Technically that means my puzzle only one-eighth as many duplicate solutions as Air but that doesn't mean it's any harder to solve.

Here's a video that demonstrates how the puzzle works.

Tuesday, October 11, 2011

Power Interruption

Last weekend a brief blackout interrupted the SD300 while I was recording a video.  I kept recording and captured the SD300's recovery when the power came on again a minute later.  This video is embarrassingly awkward and rambling, but it's potentially interesting because most 3D printers can't recover as elegantly as the SD300 did in this video.  (More on that below.)


The SD300 is connected to a netbook running on batteries, so it recorded exactly what the SD300 was doing when the power went off.  The log says it was "Taking logical tool 4" which means it was picking up the 1mm Anti-Glue pen for masking fine details, whereupon it suddenly encountered a "WriteFile Error" because the SD300 had lost power and stopped responding.

When the power came on again, the log recorded how the computer re-established its connection with the SD300.  Because the SD300 remembered it had been building a model it calibrated the Z-axis to the top of the model instead of the top of the build table.

Recovering from a power failure isn't always so effortless as it was here, but it's usually quite manageable.
  • The computer didn't lose power.  If the computer had also lost power then it would have been necessary to reboot and start the SDView software again.  The computer saves a copy of the current model on the hard drive so it can recover and continue if the computer is turned off during a build.
  • The SD300 just happened to get interrupted between changing Anti-Glue pens.  As a safety measure the SD300 won't initialize until it detects all pens are parked in their storage holders.  If it had lost power while it was actually using a pen then it would have requested the user manually return the pen to the storage holder before it would re-initialize.
  • Additionally, if the SD300 is interrupted while the top layer of the model is still attached to the material roll then it would need to cut it free before it could initialize the Z-axis.  If that had occurred, the SD300 would have adjusted the table to a safe position, reset the XY axis, and requested permission from the user to "Trim layer?"

Wednesday, September 28, 2011

Triangular Dovetail Joint

Woodworkers have made trick dovetails for years, probably centuries.  I designed this trick joint because I hadn't seen any triangular dovetail joints.  Not surprisingly, it has been done before.

All three exterior sides show identical dovetail-like joints, which makes it look impossible to open.

But the pieces don't slide like a conventional dovetail.

The two pieces rotate until they gently let go of each other.

There's a hollow cavity inside, so it can be used as a puzzle box.  Not that anyone would be terribly puzzled--it looks odd, but it's easy for anyone to open once they pick it up.

This is a simple, traditional puzzle box so I've posted the STL files at Thingiverse for anyone who wants to play with it.

Tuesday, September 20, 2011

Spring-o-sphere


Schorhr's Spring-o-sphere model on Thingiverse looked like a perfect example of a model that's unsuitable for building on the SD300: very thin walls surrounding a large trapped volume.  But that made me curious, so I included the Spring-o-sphere in a batch of models back in June.

I anticipated there might be trouble peeling the support material away, so I put a box of peeling cuts around the Spring-o-sphere so it would be isolated in its own little 'brick.'


As expected, it was tedious peeling away all the enclosed material a tiny bit at a time.  Right at the start the little hook broke off the top, so I expected more breakage.

But the rest of the material peeled away without any further breakage.

The body of the spring proved to be surprisingly resilient.  On close examination I could see lots of little loose ends.  These are unsightly but they don't seem to weaken the spring.


Evidently this unexpected resiliency was imparted by the long overlap between layers.  There's exactly 1 layer of red material in the model, but red band shows how that layer extends a long distance around the spring, thereby giving it ample distance to be bonded with the layers above and below.


It's a nice container for holding shiny objects.


Despite my relative success building this Spring-o-sphere, I still regard it as a model that's basically unsuited to the SD300 build process.  But the experiment suggests I could choose to build such a model in a pinch, provided I'm willing to sacrifice the model's visual appearance (eg: broken hook, loose ends) and invest extra effort (eg: repair hook, tedious peeling).  I certainly wouldn't recommend doing this sort of model routinely, but it's nice to know I could.

Sunday, September 4, 2011

More Assorted Stuff

I like puzzles, so I built this Mysterious Wood Joint in transparent material. According to its creator, the joint was adapted from a wood joint used in Osaka Castle. At first glance it looks impossible, but the pieces go together easily when oriented correctly. I wonder if the design could be further modified to make it more like a puzzle.


An SD300 user sent me a picture of a chain they'd had trouble building, which inspired me to attempt one for myself. Problems had occurred when the chain was positioned with alternate links vertical & horizontal like the yellow chain at left. When I built the chain, I positioned it so all the links were positioned at 45° angles relative to the build platform.


I built the model with a single peeling cut running down the center of the chain, which allowed the first half of the support material to peel away easily. But I had to fish out scraps of leftover material behind the links.


After peeling away the other half of the support material I had to fish out the last scraps with tweezers again. But that's okay because it took only a few seconds for each link.


The finished chain had a uniform texture.


I built a 50% scale version of Free Falling Maple Seed becauseI needed an arbitrary model at least 2 mm high to get some layer-thickness measurements from the SD300. The layer lines form attractive, delicate patterns.


These 45-RPM record adapters required minimal material because they're only 2 mm thick.


To add color to the adapters, I stopped the SD300 halfway through the construction of the model and scribbled between layers with permanent markers. This is the middle layer in the model; the color showed through after the rest of thelayers were bonded above this.

Wednesday, August 31, 2011

A Peek into Peeling Cuts

I've received several questions about peeling cuts and removal of the extra material, so here's a brief peek at peeling cuts with my recent screw & nut projects.

The SD300 builds by ironing layers of PVC film on top of the build platform one-at-a-time, and selectively bonding and cutting each layer of PVC film. Regions that belong to the model are bonded to the layers above and below, and unused material is left in-place (as to act as support material) until the build is finished.

Before building these four bolt models (yellow) I added one long peeling cut (blue) to divide the unused material into two halves. The layers of PVC will be stacked parallel to the table, so the peeling cut is perpendicular to the actual layers of the model.


There's no single "right" way to arrange peeling cuts. You could add as many peeling cuts as you want so long as there are enough cuts to free the model from the surrounding material. Here I arbitrarily added an extra peeling cut to isolate some of the support material into two sub-regions.


Thanks to the extra cut, the material peeled away from two of the screws at a time instead of all four. It took longer than it might have, but there's no harm in making extra peeling cuts. Peeling cuts only affect the unused material, they don't cut into the model itself.


The nuts were a little more complicated. I don't put small cuts inside hollow models like I used to because I've learned a better way to remove the material inside holes. (I'll explain that below.) I added peeling cuts between adjacent nuts, but not inside.


Solido provided strong forceps to help peel away material. Those forceps are great for most models, but they're awkward for cleaning material from holes like these so I bought a set of hobby probes.


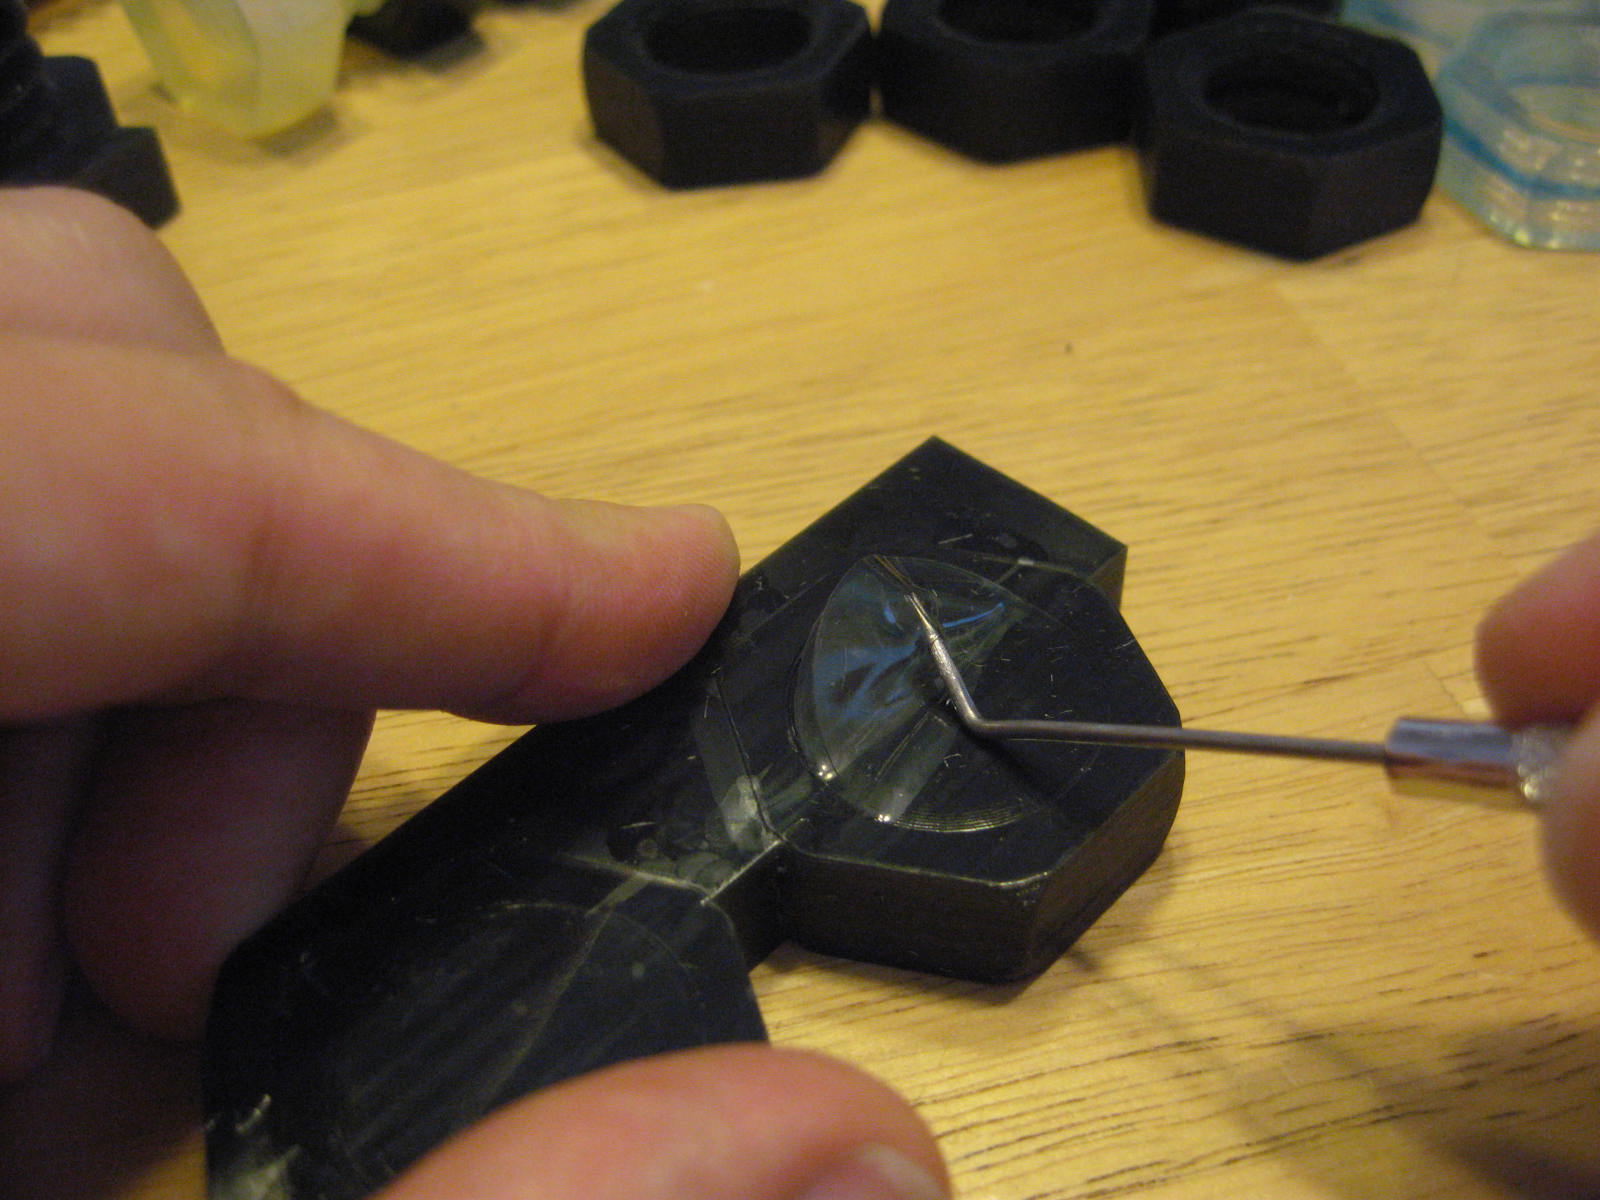
The probe's sharp point stabs neatly through several layers of unused material in the hole. Tipping the probe lifts the material so it can be pulled away.


Once the ends are free, the material can be pried out by hand.


The layers of extra material have been glued together in a chain. But these layers didn't just pull out freely; I carefully tugged at the edge of each sheet to tear out the next one, one-at-a-time.


Sometimes one layer of support material tears free of the next, so it's necessary to insert the probe and pry the next layer loose before continuing the chain.


After clearing the holes, I removed the rest of the support material from the outside.


Most observers notice there's a high proportion of unused material in each build, which is true. It's roughly like a CNC mill that custom-builds a block for each model, building up the layers additively and then peeling them away material afterward. But it's generally economical because the process is energy-efficient and uses raw material that costs 10 to 15 times less per unit-volume than other 3D printers in its price class. Nevertheless, the cost per model can vary widely from one sample to the next depending on how efficiently the material is utilized.


The SD300 can't directly re-use the leftover material, but it's recyclable as PVC scrap (recycle code 4) by bagging and tagging it and delivering it to a commercial recycler. It can't go with household recycling, so I collect the SD300's scraps in a separate bin. It could also be discarded as ordinary trash since it doesn't contain anything harmful.

Monday, August 29, 2011

Wrong-Way Nut video on YouTube

I built an enhanced version of my Wrong-Way Nut model and posted a new video on YouTube here.


Watch for better pictures and...perhaps...an explanation. Better still, can you explain how it works?

Wednesday, August 10, 2011

George Bell's Dice Box

George Bell designed this box puzzle as a conventional 3D object. It's an example of a coordinate-motion puzzle in three dimensions: its four pieces interlock and slide together to form a box if-and-only-if all the pieces start in exactly the right position and all four must be moved simultaneously.


Here's a full set of parts built on the SD300 with a contrasting red color on some sides. (It rather resembles a stop sign, doesn't it?) George's puzzle is perfectly functional, but I was still compelled to tinker so that I could exploit the SD300's peculiar capabilities.


My first modification was to transform the puzzle into a flat form with living hinges and a tuck-in tab.


When my modified piece is folded and the tab tucked in, it forms a solid shape identical to George Bell's original 3D model.
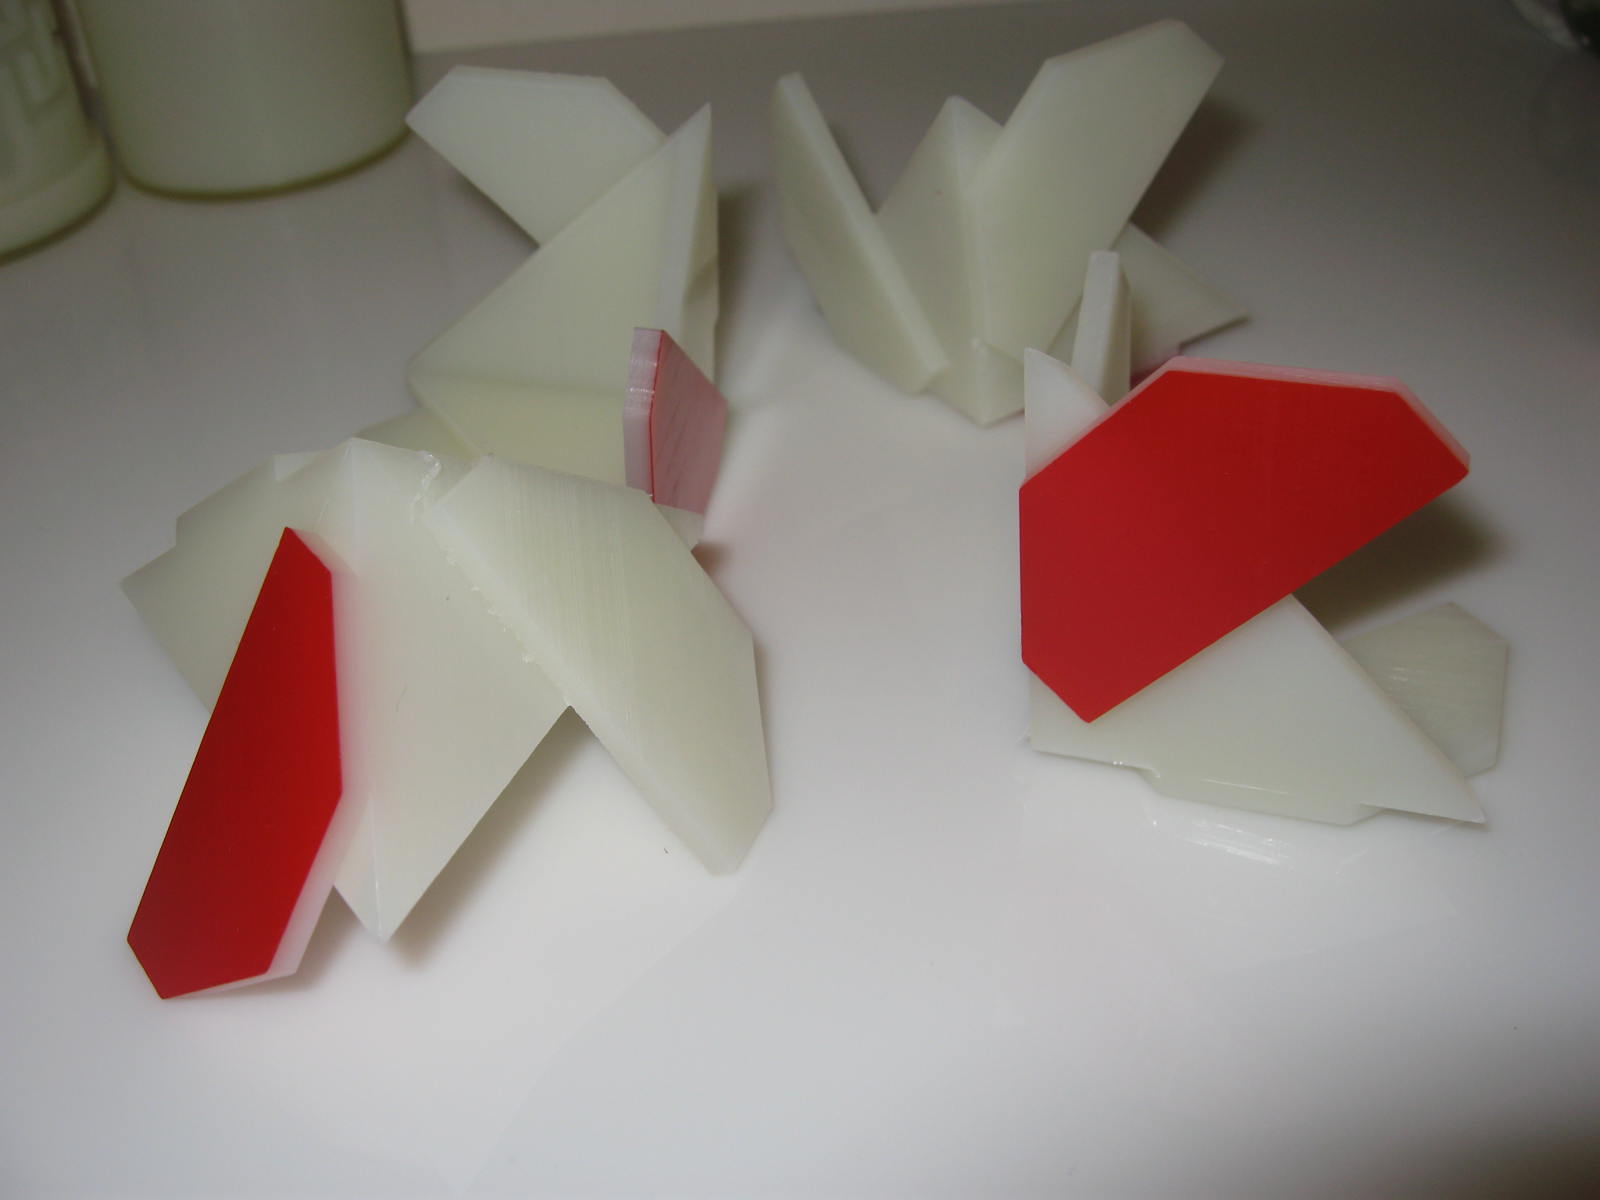

It can be assembled exactly the same as George's original model, but now all the faces have a lustrous sheen because they're all built parallel to the shiny surfaces of the PVC material.


Then I added small cylinders, raised about 0.18mm above the surfaces to resemble dice pips. And I changed material for exactly one layer while building to give the dice pips a contrasting color.


But there were sharp corners when the flat panels were folded, so George took over again and modified the design.


George's next revision rounded off the corners, so the puzzle really does look like a chance die now!


Because the puzzle starts as a set of flat panels, I decided to package it in a plastic bag with the four panels intertwined in a flat configuration. To solve the puzzle, the user removes the pieces from the bag, separates them, folds them into solid objects, and must figure out how to slide them together.


The puzzle was now named Dice Box. We packed instructions inside each bag.


I built over a dozen sets of Dice Box puzzles over the next few days, so George could take them to the International Puzzle Party.


About half the puzzles are transparent and the other half white.


Sunday, August 7, 2011

Orange, Green, and Blue Marble

George Bell graciously took several sets of my Bag of Marbles puzzles to the International Puzzle Party in Berlin this year. Currently I have three styles of marbles, distinguished by color.


Orange Marble was my first design, a puzzle with two interlocking pieces that slide together unintuitively. It was created by accident as part of a design that I abandoned while studying Bram Cohen's Trapped Marble prototype. Although the two pieces are different from each other, they can be flipped relative to each other and they slide together symmetrically.


Green Marble is another two-piece design. This time the two pieces are identical, but they only fit together when the pieces are oriented in one specific orientation.


Blue Marble is based upon the same curves as Green Marble but divides a sphere into three pieces instead of merely two. Most people fit two of the pieces together easily, but instinctively try to insert the third piece upside-down...which doesn't work.


Here's how a batch of Blue Marble pieces looked shortly after I'd removed them from the SD300 and removed some of the support material.


Unprocessed pieces have a translucent sidewall finish. It's attractive, but I wanted a shinier smoother finish.


To smooth the side walls I dipped each piece in Weld-On 2007 solvent for 30 seconds.


After their solvent bath I laid the pieces on baker's parchment to dry. Parchment is non-absorbent and the wet pieces don't stick to it, so it's an ideal disposable drying surface.


Eventually I plan to add other Marble styles (and colors) to the series as I think of new challenging features to add.