Thursday, March 31, 2011

Twirlicue Puzzle Pendant

Shapeways built my Twirlicue pendant in solid silver and I received the parts today.


The two pieces can be assembled so they merge together into a slender, twirly shape like this. It looks simple enough, but there's only one way to put it together so it's a bit trickier than it looks!


Here's the finished Twirlicue pendant compared with the first prototype I'd built on the SD300. I enlarged the silver model over the original design because it was hard to hold onto.


The assembled pendant can be hung from a chain or cord and worn as a necklace.


Shapeways sells each piece for $44 USD (plus $10 for an optional polished finish) and it takes two piece to form a complete Twirlicue Pendant so it's not a dirt-cheap puzzle. But it's pretty!

Tuesday, March 29, 2011

Conjoined Vica Illusion sculpture


When I was preparing to build a full-size version of Chylld's Vica Illusion Sculpture I noticed SDView, the SD300 build software, displayed the model at an angle that would allow two of them to be conjoined by making a second copy and overlapping it with the first. SDView won't ordinarily build if two models overlap, but it merges the meshes if the model is exported. The exported file can then be built as a single mesh with two overlapping shells.


My previous test-build showed me how to arrange peeling cuts for efficient removal of the support material, but I didn't have experience with the conjoined area so I programmed SDView to leave an isolated region of support material between the two halves. This worked out really nicely because it kept the two halves stable until I was ready to remove the last bit of support material connecting them.


The conjoined sculpture isn't as elegant as the original but it's novel. And that's all I wanted.

Sunday, March 27, 2011

Another test in leftover build volume


I've been admiring the data for Chylld's Vica Illusion Sculpture but I've been reluctant to build it because I would want to build it in a horizontal orientation, and I admit I'm unsure about arranging peeling cuts. On the one hand I could play safe by arranging peeling cuts to isolate each part of the sculpture, but so many isolated zones could result in a lot of unnecessary work to clean away the supports. Did I really want to build a throwaway model just to determine how many peeling cuts are necessary?

There was a small empty volume in the build envelope for an unrelated model, so I decided to build a scaled-down version of the Vica sculpture just to test it. This is essentially a "free" model so I ambitiously tried the simplest peeling cut layout I could think of, dividing the model into only 4 zones, of which 2 were exterior regions that would be peeled away normally.


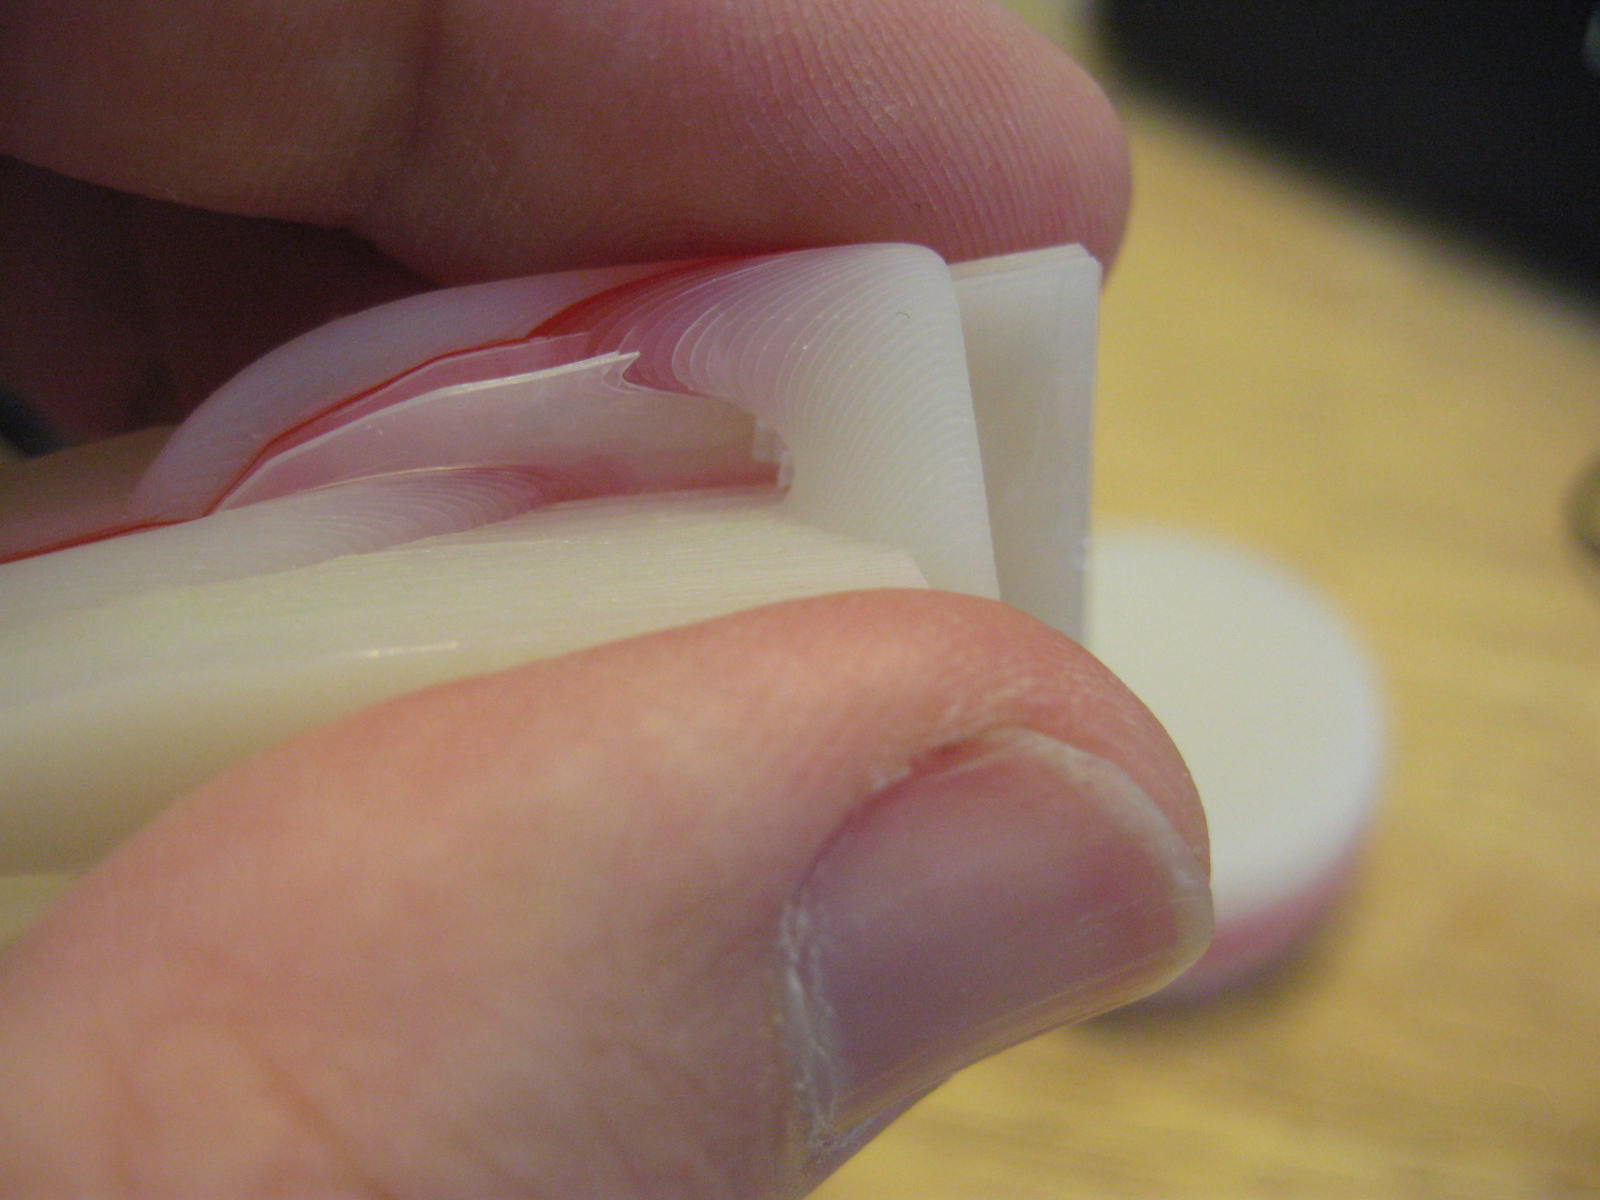
The 2 exterior regions peeled away effortlessly while cleaning up the principal model, leaving the Vica sculpture embedded in a small cocoon of its own. The top surface shows the outlines of the remaining two zones that need to be peeled away.


It went surprisingly well, so I'm glad I aimed for such simple layout. The only issue was a region near the center of the model, where a handful of layers needed to be peeled from the topside of one part of the sculpture while the same layer extended to the underside of the other part of the sculpture. A few strips of material had to be loosened and tucked (or pulled) through an opening in the sculpture.


That issue could be remedied on future builds by adding an additional peeling cut (arrow) to separate the support layers near the middle of the model. It doesn't need to run the full height of the model because the problem only affected the innermost layers.


Despite that one peeling problem, and the model's thin structure, the model held together very well because the last region to be peeled formed a nice keel-shaped backbone that reinforced the model while I was clearing the exterior sections. This material peeled away effortlessly because it wasn't entangled with the rest of the model.


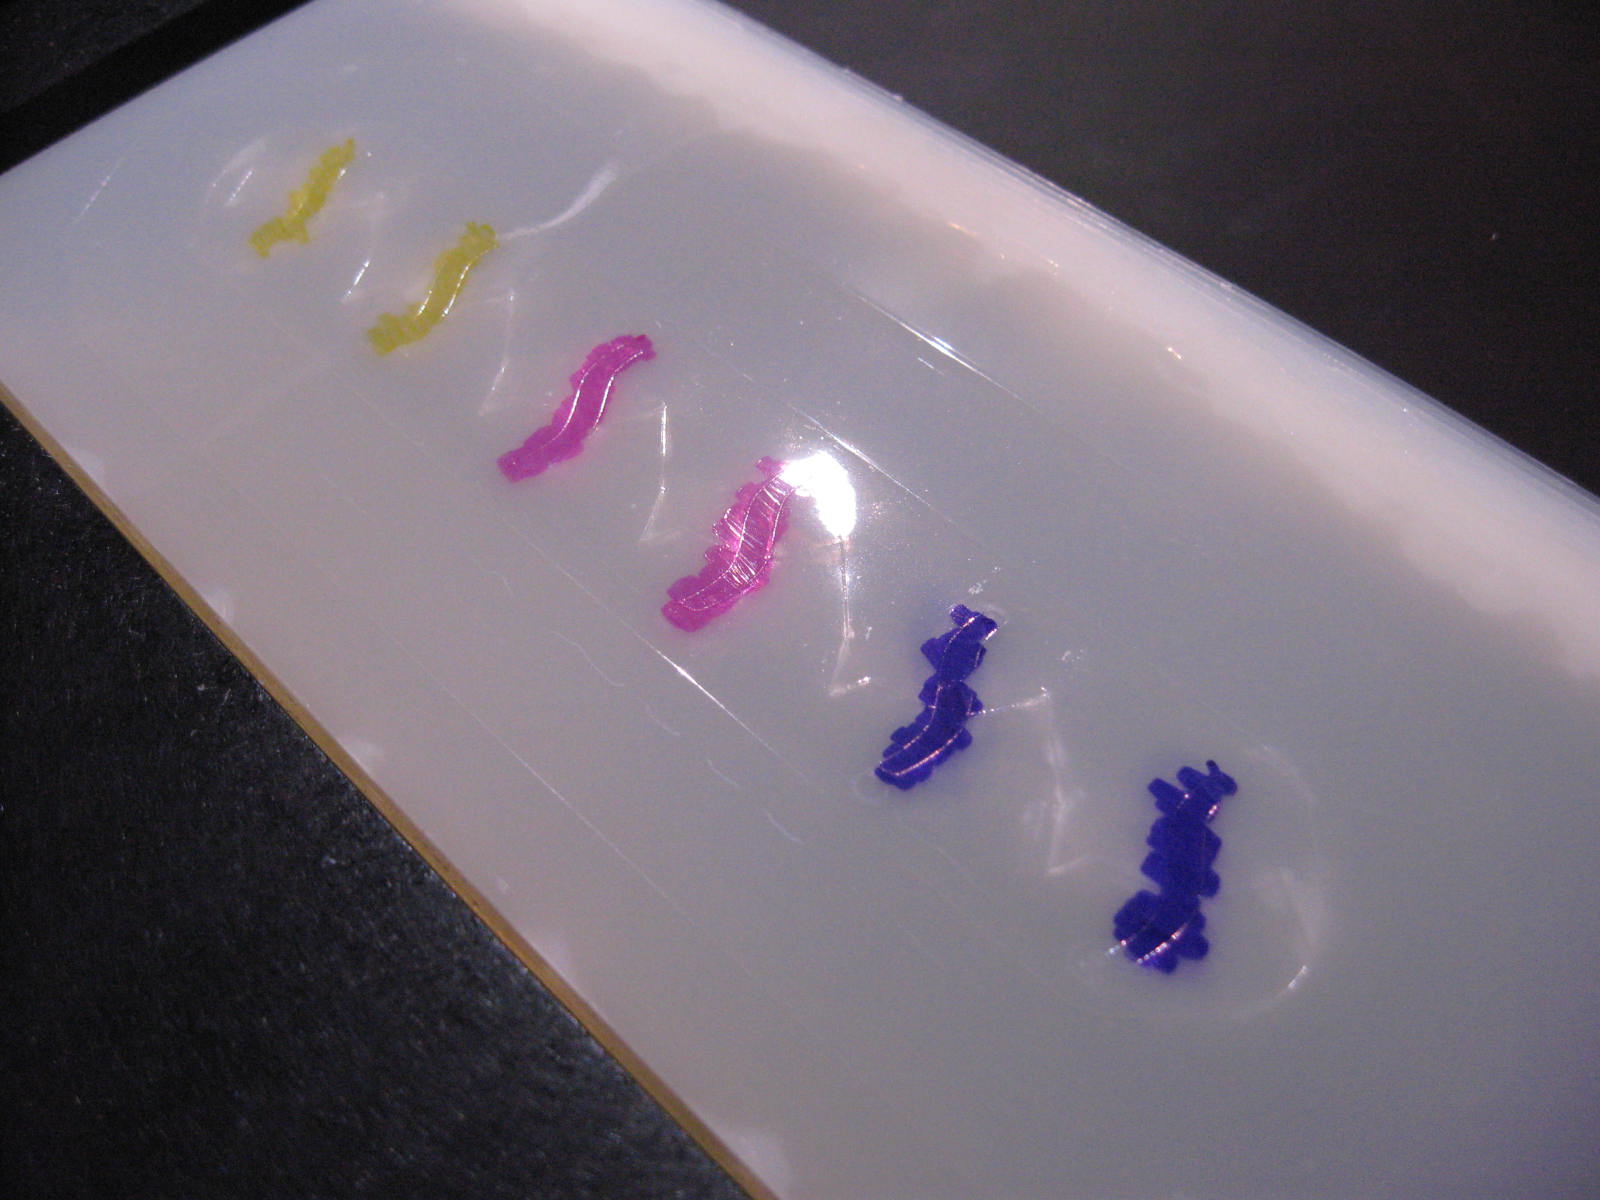
So the downscaled model emerged intact and attractive. Even at this reduced size the walls were thicker than 3mm, which puts the model within the SD300's optimal safe-build range. There's exactly 1 layer of red material through the model's exact center, so the red marks indicate where the sculpture's structure passes through its midpoint; a cool bonus feature!

Monday, March 21, 2011

Bradley's iPhone 4 Case Mod

Before I got my own 3D printer I always liked doing business with Bradley Rigdon at printo3d.com because he was always happy to try experimental ideas, so long as they were reasonable. For example in 2008 he shared a video of a Rubik-style cube that was built already-assembled on a Dimension SST 1200es in collaboration with another puzzle designer.

A longtime supporter of 3D printing in general, Bradley was lucky enough to get his original iPhone case built in Desktop Factory's unique additive process before they ceased development.

I recently built Bradley's updated iPhone 4 case on the SD300.


The new case has tiny letters embossed on the inside, so small that I couldn't remove the plastic inside. But the cuts were sufficiently clear and legible that it wasn't really necessary.


I installed a new XY cutting knife at the start of the build, but it broke part way through so I reinstalled the old knife to finish the model. This is the first time I'd seen a new knife fail so quickly, so I hope it was just a freak accident.

Regardless, it offered a rare opportunity to compare the cutting quality of a new knife to a worn one. On the model at left you can see a slight transition in sidewall texture where the knife was replaced. The new knife produced walls with a clean, lustrious texture while the old knife had a slightly frosty texture.


The finished model has a fold-out kickstand and tripod mount.


Bradley ambitiously wanted to peel the supports himself making use of his experence with Dimension's BST break-away supports, so I give him this video documenting how I'd cleaned the model. It's rather dry, but it was intended to be instructive not entertaining.

Sunday, March 13, 2011

Twirlicue prototype

On Thursday I learned Shapeways has permanently added solid silver to their material choices. Plenty of service bureaus offer precious metals, but Shapeways makes it so hassle-free that I wanted to devise something new just to exploit their new capability.


I designed a twirly shape that resembles a twisted potato chip, which is intended to be both a puzzle and a pendant. I built test models on the SD300 before sending it off to Shapeways. Just experimenting, I tinted the models by applying permanent markers to the exposed surface partway through the build process.


Here are the colored markers beside the finished parts. A visual illusion makes it seem as though the colors 'bleed' through the layers, but that's just an optical behavior of the transparent material.


I designed the models to be exceedingly thin because silver is such an expensive material, so these test models are also very thin. Consequently a piece broke away from one of the models when I was cleaning it.


The 'puzzle' is to assemble two pieces as shown here, which will allow them to be strung onto a necklace chain. The chain is a 1mm Sterling Silver box-link chain.


Here's another view showing how tiny and thin the test parts are compared to a US one-cent coin. I don't ordinarily build such thin parts on the SD300 because they require a huge investment of extra attention to remove the supports. It took at least an extra hour to clean these six parts, and I broke one.

Monday, March 7, 2011

Flexible Snake from Thingiverse


Sometimes it's exciting to build models like this Long Snake by Zomboe from Thingiverse, just to see how they adapt to the SD300's unusual material properties. This one was particularly easy to lay out on the build table with a single peeling cut running down the 'backbone' of each model.


I switched colors during the build to give the snake contrasting stripes.

After building, leftover support material tended to cling inside all the narrow slots so it required a little extra force to tear it free. It went quickly, but I had to pick a few stray pieces out of the cavities afterward.


Each snake has a flexible spine consisting of a 0.6mm wall running the length of the model. The concept could probably be applied to other arbitrary solids to make them springy and flexible.