Saturday, October 30, 2010

Isolated Marble, rev 2

I refined the curves and angles in yesterday's Isolated Marble prototype and built another today. I gave the model a black stripe to distinguish it from the previous model by changing to black material for 6 layers part way through the build.


It works better than the previous revision, but it reveals more details that need refinement.


The curve was supposed to be smooth, but it exhibits a rough texture like a washboard. That's not a build problem, it's an interference pattern in the source data. A silly mistake, but it'll be easily fixed.

Friday, October 29, 2010

Isolated Marble, a work-in-progress

Some time ago I tried to develop a variation of Bram Cohen's Trapped Marble puzzle, which is now being sold by Hanayama Ltd as Cast Marble. I tried to modify the cuts as radically as possible, but the puzzle as a whole behaved just like Cohen's original. It apparently lacked novelty, so I stopped working on it.


The challenge in Bram Cohen's original puzzle was to assemble all four pieces; there was no challenge assembling the two-piece marble without the rest of the puzzle. But in the following months, many people have been confounded by the central 'marble' from my prototype. It just doesn't go together as people expect.


The secret to assembling the marble by itself is to withdraw the parts farther than you might intuitively expect, until they elegantly nest and join together. My four piece prototype had been designed to be assembled from a widely-separated orientation, but I hadn't anticipated the two central 'marble' pieces would retain this behavior without the other two pieces. It turns out to be a satisfying puzzle all by itself!


So I've begun exploring designs for a two-piece marble puzzle. To help distinguish each batch of prototypes I briefly installed red PVC for several layers in the middle of the build, which gave these parts a red stripe. For subsequent prototypes I will try swapping-in small amounts of other colors, again to uniquely identify each build.

Thursday, October 21, 2010

Built-in color graphics

This weekend I built some parts with shiny, colorful graphics built-in.


I embossed a thin extrusion of a heart-shape, 0.17mm thick, onto the tops of four parts. For building, I arranged the parts on the table (not as shown) with the embossed graphic parallel to the build platform. (The SD300's build software has a 1-click tool to do that.)


I built most of the model in white material, then switched to red material for the last layer. Hence most of the model was white, but the embossed heart shape was built using red. The excess red material simply peeled away with the supports, leaving the red graphic integrated into the model.


The finished parts have the colorful heart graphic integrated right into the model. Unfortunately, red is the only SD300 material that seems to offer enough contrast for this technique. The "black" material isn't dark in thin sections (but I'm working on a workaround). Solido lists "blue" material for the machine, but dealers don't have any inventory.

Saturday, October 16, 2010

Clearing an X with a probe

It's occasionally handy to have a set of general-purpose probes at hand for cleaning support material from small openings and crevices. They aren't needed for most jobs, but they're invaluable for a few situations.


This model had two blind holes, which I filled with X-shaped peeling cuts. I made sure the cuts didn't touch the walls in order to avoid splitting the material into sections.


After building, the X marks identify the material that needs to be removed from the holes.


It was too awkward to reach inside the holes with the standard tweezers, as there just wasn't enough room to operate the jaws. But the probes are perfect because the thin point can hook under the X. The probe's point is small but not sharp, so the slightly blunted tip doesn't scratch the model.


The X disappeared after the last layer of support material was removed, visually confirming the hole had been cleared completely. When I had used tweezers for similar jobs I'd always scratched or gouged the bottom of the hole; the probe worked much better.

Saturday, October 9, 2010

X Marks the peeling cut

In one of my first posts I suggested running a peeling cut through holes to give the forceps something to grab onto when peeling away the supports. But it's not so good to run a cut through a large hole (or hollow area) because it divides it into two sections, which could take twice as long to peel. It also reduces the size of the Z-folds, so the support material is more likely to tear instead of coming out cleanly.

So I've begun adding an X-shaped peeling cut inside hollow areas, not touching any walls.


At first the X-shaped cuts don't look useful because they don't touch any walls, which goes against the standard convention for peeling cuts. But they conspicuously identify the leftover support material.


The X provides a convenient location to grab the support material without touching any walls, thereby preventing the forceps from scratching the model.


The Z-folds work better because all the sides are clear of peeling cuts. Even if the material tears during peeling, the X provides a safe place to get hold of the remaining layers and begin peeling again.

Wednesday, October 6, 2010

FInally, my second failed build

Ordinarily, the SD300 tests the integrity of the XY cutter at the completion of each layer by using the cutter to separate the model from the material and then attempting to rewind the material onto the source roll. When a cutter is worn out the material remains attached to the model and the machine emits a distinctive noise from an internal clutch.

The machine had a relatively new XY cutter, so I was surprised to hear the slipping-clutch noise which usually indicates a worn out cutter. The machine's log seemed to express the same astonishment, "the cutting knife is new and the previous layer was OK." Evidently the SD300 concluded the XY cutter was too new, so it just tried to continue building the model until I intervened.


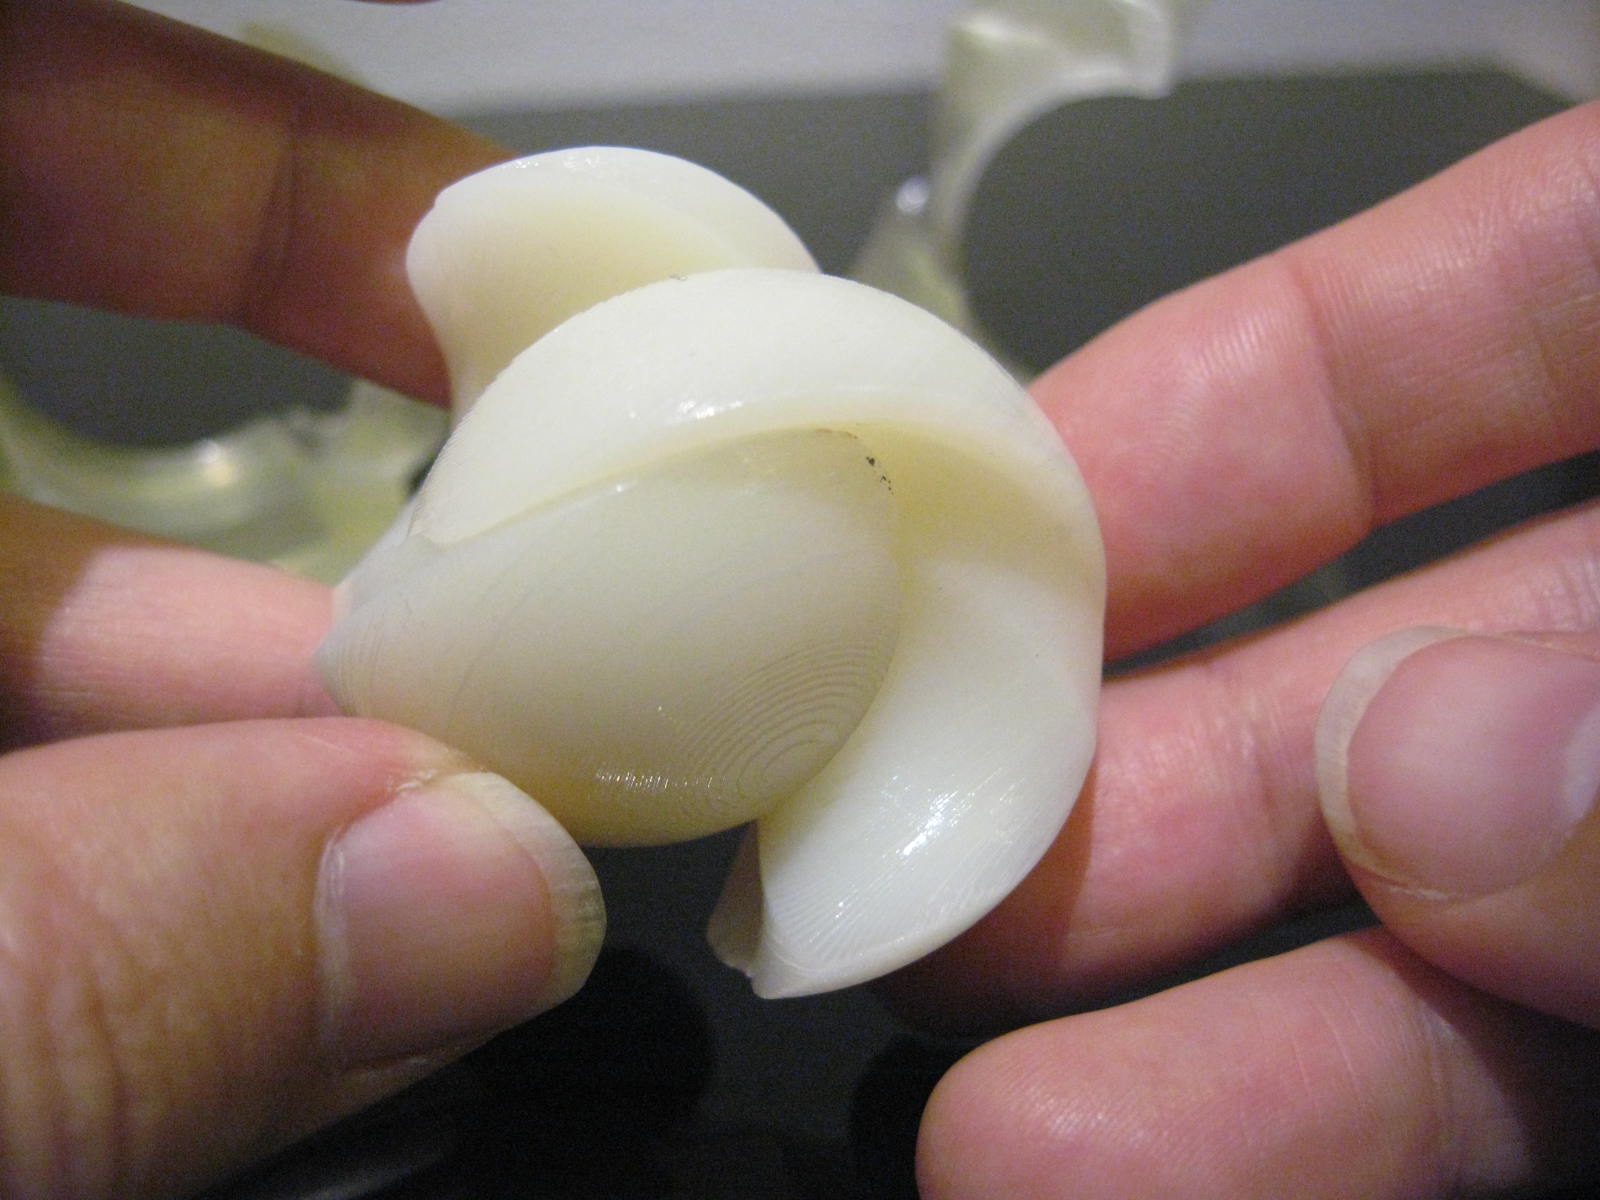
Normally the machine can continue to build the same model after the XY cutter is replaced, but inspection revealed this model was full of air bubbles. The glue hadn't been spreading properly so the layers weren't welding together. This model would be defective, even if the rest of it built perfectly.


I ran some tests which confirmed the culprit was the XY knife, not air in the glue system. I've had other knives wear out, but this was the first occasion where it caused any problem with the model being built. Evidently it had scraped the model surface, creating gouges and voids which prevented the glue from spreading between sheets. Everything worked when I replaced this cutter (shown below) with a new one.


Frankly, I'm pleased to have only two failed builds since I bought the machine in February. That compares favorably with colleagues who use V-Flash and Dimension modelers.

Admittedly I've had bad builds for other reasons, such as bad STL designs or improper layouts, but only two builds have been defective. My first defective build was entirely my own fault, as I'd allowed the glue to run out. This one might have been a freak incident.