I finally managed to build my Cooksey-inspired flat maze on the SD300. My last build failed because I'd been using a worn cutting knife, and this model packs a whole lot of cuts into a very tight space. I put in a new, factory-calibrated knife shortly before building this model.
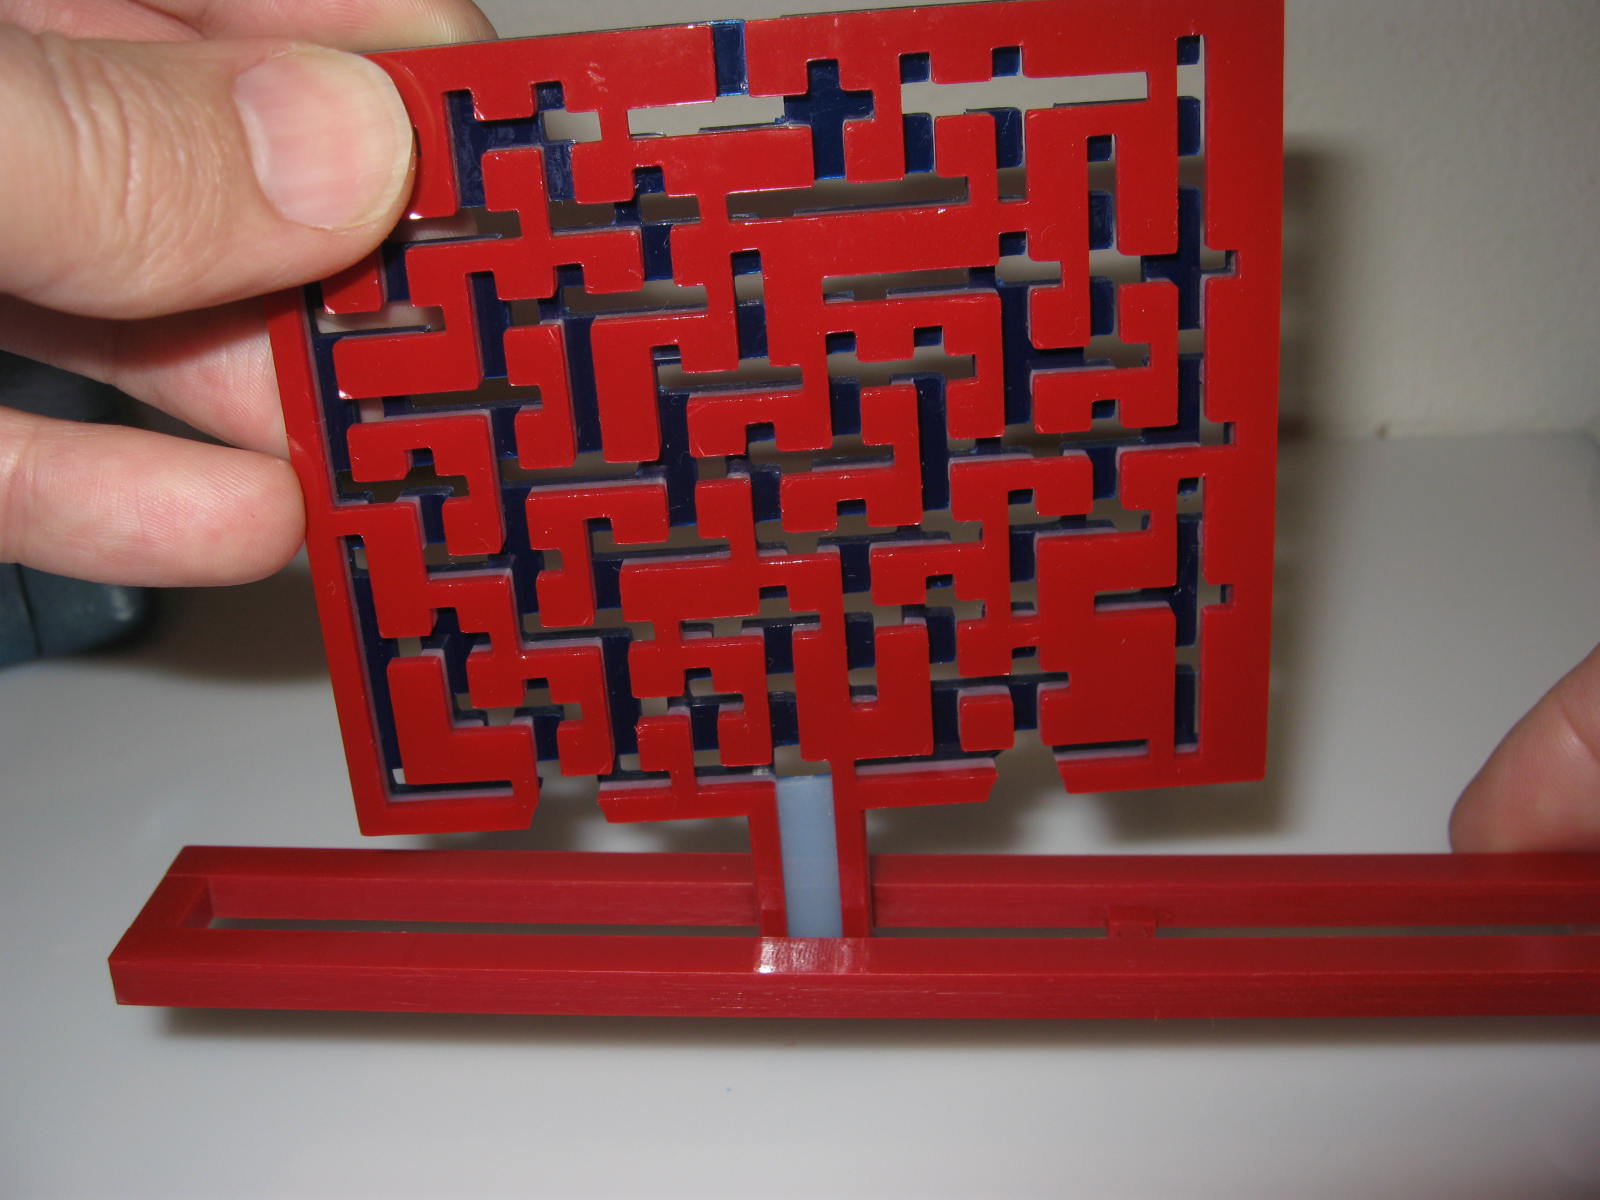
I'd used three colors by switching materials between the major areas of the puzzle. That yielded a surprise bonus because unused material was consequently color-coded to easily distinguish the difficult middle section.
I had programmed SDView with an elaborate scheme of peeling cuts to ensure the middle layer could be cleared from the outside, but I'd still overlooked a design detail. Consequently, a lot of the material had to be freed by tediously tugging pieces of material sideways before pulling it out through the openings.
When the puzzle is fully assembled, the shuttle rests in a grooved handle. The side walls keep it securely nested in the handle.
A disc at the bottom of the handle prevents the shuttle from coming off at the end, so the only path to remove it is to slide the shuttle into (and through) the maze.
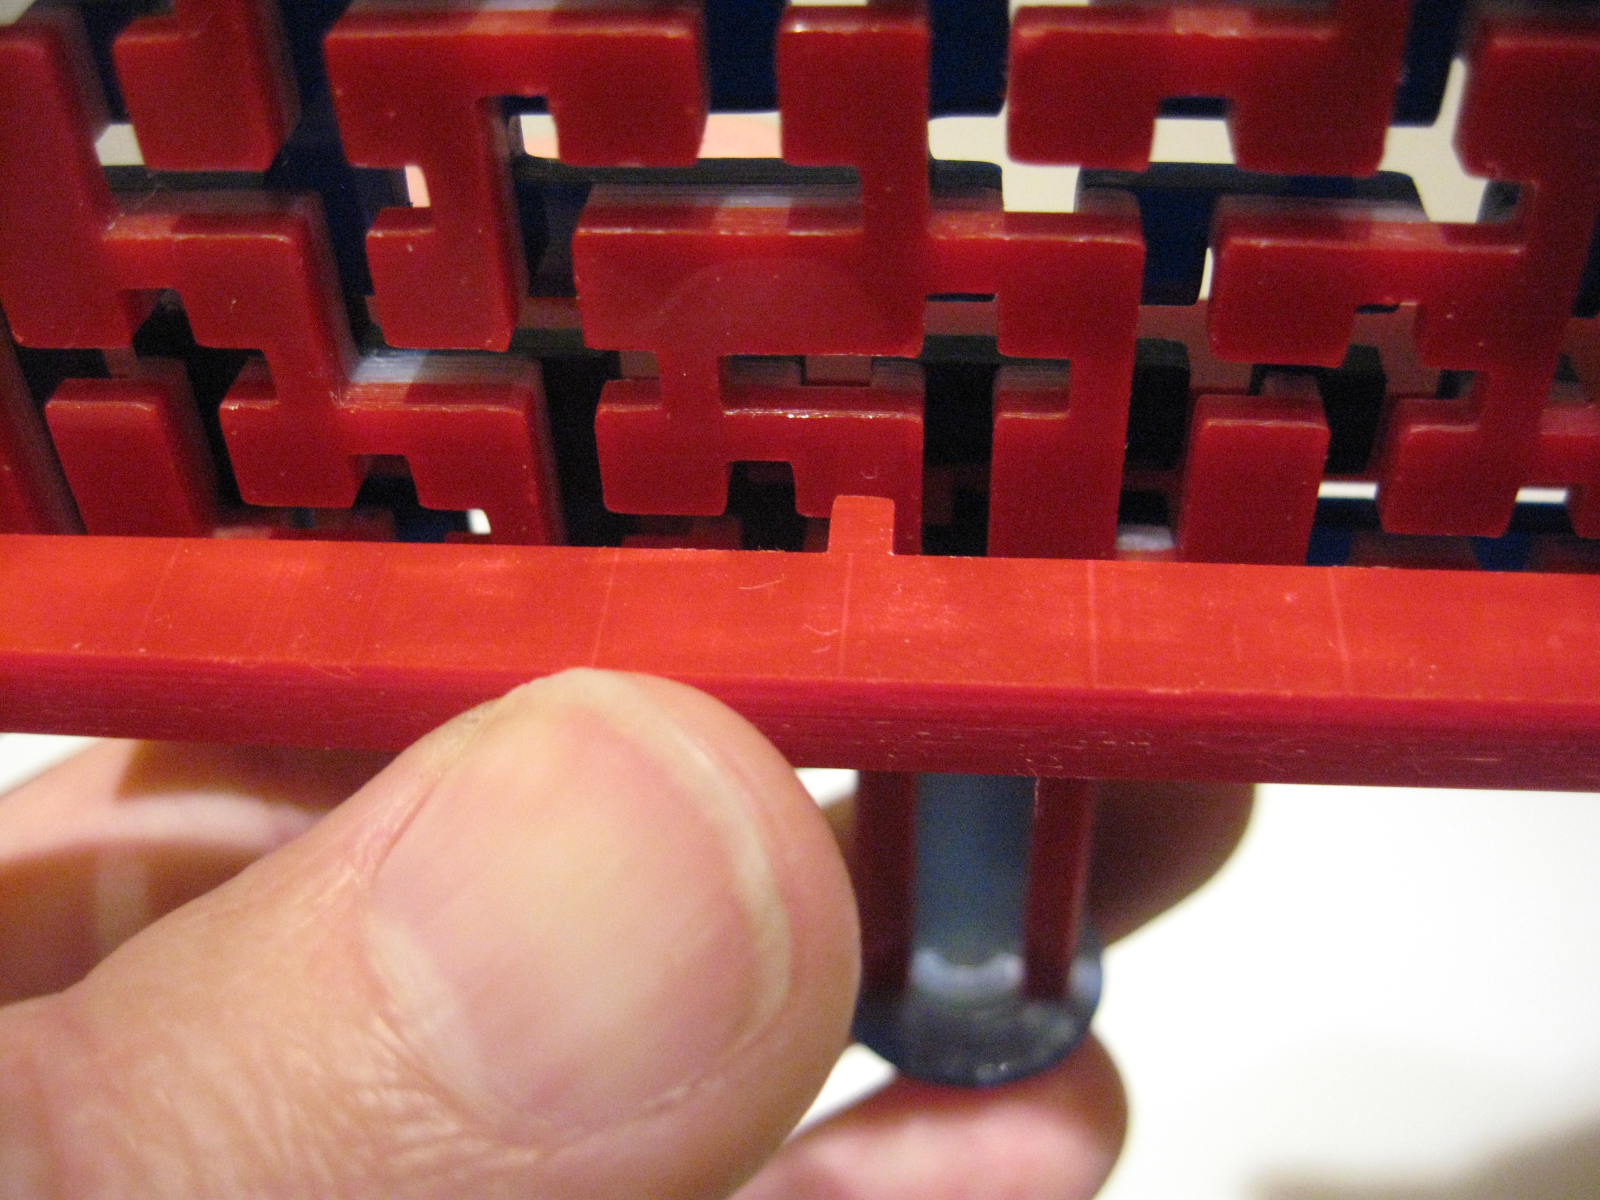
The tab on the shuttle only allows movement along one axis (vertical) when it travels on the red side. Horizontal movements are blocked so long as the tab rests on the red-side grooves.
Another tab can be pushed into the blue grooves on the flip side of the maze.
Engaging the tab on the blue side disengages the tab on the red side, so horizontal movement is no longer blocked. This allows the shuttle to move left & right as far as the groove on the blue side permits.
The user navigates the maze by alternately engaging the tab in the blue side for horizontal movements and engaging the red side for vertical movements. Neither side exhibits the actual maze, so the correct path is not apparent.
Eventually the shuttle emerges from an opening near the start of the puzzle.
The shuttle is still hooked over the puzzle's handle, but now the tabs aren't locked into the grooves in the handle.
This arrangement allows the shuttle to spin around on the handle so the tabs move to the other side.
Now the shuttle can re-enter the maze, but with the tabs on opposite sides from before. Now the horizontal movements occur on the red side and vertical movements on the blue side. It's a completely different maze, without any similarities to the first.
By navigating through the mazes as shown, the user can eventually remove the shuttle through an opening at the top of the puzzle. Naturally it's not
quite as simple as it seems because there's still a subtle subterfuge or two.


Cool idea! Is there any part of the puzzle that can't be made using a laser cutter? You are just using your 3D printer here because you don't have access to a laser cutter? Is that true?
ReplyDeleteI thought about casting it in various materials, but I completely overlooked the potential for laser cutting! Both slab and shuttle would require multiple pieces to achieve the required 3D profiles. Some 3D elements wouldn't be laser-cuttable, such as depth-keying (not shown) which blocks invalid shuttle orientations at the entrance.
DeleteBut although the parts could be made using a laser cutter, it wouldn't be very practical to assemble this particular maze because there are too many separate pieces. The red layer pictured above has seven variously-shaped 'islands' that would need to be precisely positioned and bonded to the middle layer, which is divided into many more isolated pieces.
Even so, an adaptable design could undoubtedly be created by carefully planning the maze at an earlier stage.